Gluten Free Meat & Poultry Seafood

Mild Jamaican Jerk Marinade.

Over the years dad’s tolerance for anything spicy has diminished considerably, and it’s to the point where he can’t handle any ‘spicy’ heat. Sadly it means no more of his fav Jerk Pork and Jerk Chicken. With that in mind and with a new crop of Pimento (seasoning) Peppers in the garden, I knew I had a solution.

1 large onion (chopped)
6-8 pimento peppers
6 scallions (chopped)
15-20 sprigs thyme (no woody stems)
4 thick slices of ginger
8 cloves garlic
3/4 tablespoon ground cinnamon
2 tablespoon Pimento (allspice) berries
1/2 tablespoon nutmeg
3/4 tablespoon black pepper
3 tablespoon brown sugar
3 tablespoon light soy sauce
1 cup rice vinegar (any plain vinegar will work)
1 cup veg oil
6 bay leaves
2 tablespoon mushroom flav soy sauce

Notes. If making this marinade gluten free, use Tamari instead of soy sauce. May I suggest that you follow along with the video below as much more about the recipe is discussed there. Especially why you’ll get better results from crushing the pimento berries vs using already ground allspice. Likewise for grating the nutmeg fresh vs using nutmeg powder. Using the pimento peppers will give you the scent, flavors and oils of a scotch bonnet without the heat.

Give the necessary ingredients a good wash with cool water, drain and rough chop. Be mindful that if you use thyme with woody stems it will not break down and become a potential choking hazard later on when you use the jerk marinade.

Crush the pimento (allspice) berries (seeds).

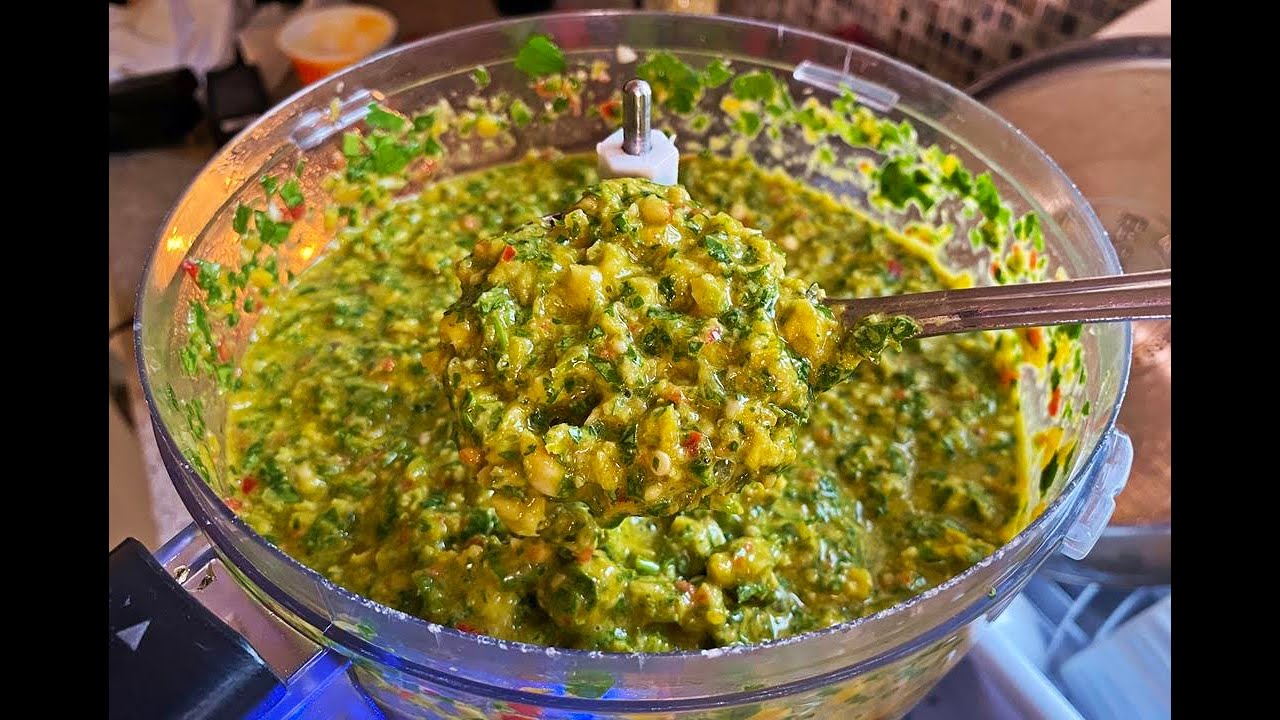
As explained in the video I prefer using a food processor instead of a blender as I like the finished jerk marinade to have a bit of texture. However, if you want a more smooth paste, the choice is all yours.

Place everything in the food processor and go at it for a couple minutes. Why I included bay leaves in the marinade is explained in the video.

I didn’t add the thyme to the mixture at first as I didn’t have room in the food processor.

Should you want to use honey or maple syrup instead of the brown sugar, it’s all up to you.

If you can source the pimento peppers (try West Indian and Asian supermarkets), you’ll understand what I mean about the fragrance once you cut into them. Disclaimer! Typically there’s no heat in pimento peppers, however the odd time (depending how close they’re planted to spicy peppers) they can be spicy. Nibble on a piece to confirm before you go all in.

If you don’t have a lemon, you may add the juice of a couple limes. In the past I’ve used orange, clementine and mandarin juices with great success.

After a minute or two, you may scrape down the sides of the food processor and add the thyme. Continue until you get the consistency you desire.

Store in glass jars in your fridge for up to 6 months. Be sure to stir well before you season and marinate your meats and seafood, for that wicked Jamaican jerk kick!

Yes, no scotch bonnet peppers, but you’ll be very happy with the pimento pepper replacement. Especially if you’re like my dad and heat is your enemy!


Caribbean Green Seasoning
Gluten Free Sauces & Condiments Vegetarian

Caribbean Green Seasoning.

Yes, I’ve shared a few Caribbean Green Seasoning videos on YouTube and Facebook, and while I have shared a version here on the website, that recipe dates back to 2009 and since then over 700 recipes have since buried it. Basically people are having a difficult time finding it. If you’re not familiar with Caribbean Green Season, it’s the go-to marinade for our poultry, meat, fish + seafood and vegan/vegetarian dishes.

You”ll Need…

750 ml Olive Oil
15-18 scallions
.226g (about 1/2 lb) garlic
3 cups chopped parsley
6 Pimento peppers (aka seasoning pepper)
2 Green Scotch Bonnet Peppers (see note below)
2 cups chopped Cilantro (coriander – see note below)
1 bundle Thyme (about 50-70 sprigs)
1 cup chopped celery (leaves)

5 Italian roaster Peppers

Note. Please watch the video below as I explain a few things concerning the ingredients of my (and potentially your) Caribbean Green Seasoning. Especially why I DO NOT recommend adding ginger, rosemary and basil. Further to what I mentioned, I find that since Basil is a delicate herb and, it’s better used fresh. If I had more seasoning peppers (Pimento) I’d use those instead and not the Italian Roaster Peppers (Cubanelle works too). Since I didn’t have time to drive to Toronto to get Chadon Beni (culantro) I opted for Cilantro. Usually my garden has Spanish Thyme (big leaf aka podina), sadly not this year. Should you do decide to use Rosemary and you have Spanish Thyme, do use sparingly as there are very pungent and can overwhelm your Green Seasoning. As explained in the video I use Olive or Grape Seed oil as my base as it helps to maintain the vibrant color and flavor of the finished green seasoning. Traditionally people use water or vinegar. Finally, you’ll notice I didn’t use any onion in my Green Seasoning, as I find that it diminishes the shelf-life of it (goes bad quickly).

Start by washing the ingredients really well, especially the cilantro which can have a bit of dirt still attached to the roots. In washing, remove dead leaves and other debris.

Allow them to air dry on a kitchen towel, then give everything a rough chop to make it easier for your blender or food processor. I much prefer using a food processor as I can get it to the perfect texture and consistency. I like it somewhat thick and with a bit of body as compared to most people who basically liquify it.

With the Thyme, you may use the tender stems, but PLEASE Remove the woody ones and discard. They may not break down in the food processor and become a choking hazard when you use the Green Seasoning later on in your meals.

Stack (in layers) some of each ingredient, add about 1/2 the oil and pulse with your food processor (yes, you can use a blender as well). Stop to scrape down the sides and to keep adding more of the herbs, garlic and peppers.

I like layering the ingredients as I find I get a much better combination at the end. I did mine in two batches as this lot will make a few containers of Caribbean Green Seasoning.

I then fill up containers (save the ones after use as the Green Seasoning smell and taste will taint them), BUT leave about a cm space to the lid. Then to the back of the fridge where they live for the next couple months… until it’s time to make another batch. They will keep for at lest 6 months in the fridge if you’re wondering. Additionally you can freeze the Green Seasoning in ice trays, pop them out, then into a freezer bag and store in the freezer. Every time you need some, pop a cube out, instead of having to thaw a full container.

Recipe Card

Difficulty: Intermediate Prep Time 10 mins Total Time 10 mins
Servings: 10

Description

A large-batch version of Caribbean green seasoning, ideal for meal prep and frequent cooking. This traditional blend of fresh herbs, peppers, and aromatics is a cornerstone of Caribbean cuisine, used to marinate meats, season stews, and elevate everyday dishes with bold, authentic flavor.

Ingredients

Instructions

Video
  1. Wash all herbs and peppers thoroughly and allow them to air-dry. Roughly chop the herbs, garlic, and peppers to prep for blending. Remove woody stems from thyme; use only tender stems and leaves.
  2. In a food processor or blender, add half of the chopped ingredients and half of the olive oil. Pulse until the mixture begins to blend.
  3. In a food processor or blender, add half of the chopped ingredients and half of the olive oil. Pulse until the mixture begins to blend.

  4. Gradually add the remaining ingredients and olive oil, blending until the desired consistency is achieved.

  5. Transfer the green seasoning to clean glass jars, leaving about 1 cm (½ inch) of space at the top.

Tell us what you think
Meat & Poultry

Easy Air Fryer Jerk Chicken.

I’m not the biggest fan of Air Fryers as explained in the video down below. However I must say, not only are they super-easy to use, the results are not half bad. These jerk chicken drumsticks came out juicy, packed with jerk flavors and finished with the bbq sauce.. lets just say WOW!

You’ll Need…

2-3 lbs chicken drumsticks
1 tablespoon HOT Jamaican Jerk Marinade
3 tablespoon regular / mild Jamaican Jerk Marinade
2 scallions (chopped finely)
4 sprigs thyme (leaves only – no stems)
1 lime (juice)
1 tablespoon golden brown sugar
1/4 cup apple juice
1 tablespoon olive oil | 3 tablespoon BBQ Sauce

Important! The goal with this recipe was to make something tasting great with ease and convenience. Therefore I used store (bottled) bought Jamaican jerk marinades. Should you want to make your own Jamaican Jerk Marinade, I have a few recipes on here.

  • Please note that I’m still experiencing camera issues so some still-shots were not taken. However you can follow along with the video below.

Remove the extra fat from the chicken, but leave the skin on. Unless you’re cutting back on your fat intake and you prefer the skin off – do your thing.

In a bowl place all the ingredients mentioned, EXCEPT the BBQ Sauce. And give it a good mix.

Pour 2/3 of the jerk marinade we just assembled on the chicken and reserve the remaining 1/3. Then go ahead and massage the chicken pieces to coat evenly with the marinade. Allow it to marinate for at least 2 hours in the fridge (covered). If you use your bare hands to massage the chicken pieces, please wash immediately after with soap and water. The peppers in the jerk marinade can be a bit deadly – it may also irritate your skin.

After two hours lay in your air fryer (line the tray if you normally do, for easy clean-up), try to NOT crowd things. Then it’s 380 for 20-25 minutes, depending on the size of your chicken pieces.

8 minutes in, you’ll need to flip them over for even cooking.

After 23 minutes I removed them from the air fryer. Then mixed in the BBQ sauce with the remaining jerk marinade (mix well) and I slapped a coat onto the chicken pieces (use 1/2). It cooked for 3 minutes at 400 F, then I flipped the chicken pieces, and on went the final coat of the bbq sauce mixture. Cook for 3-4 minutes.

Please be mindful that the last 5-7 minutes is crucial for getting that lovely color, charred bits and that lovely sticky bbq finish. Yea, not true Jamaican Jerk, but it works when it’s the middle of winter and it’s -15 C outside. Should you want a hint of smoky flavor, you can always add a couple drops of liquid smoke or smoked paprika in the marinade.

Such a simple and delicious way to make chicken. Toss on some finely chopped parsley, squeeze on a few drops of lime juice (should you have some) and ENJOY!

VERY IMPORTANT!

You will notice that I used a Cosori Air Fryer in making this recipe. A day later there was a recall notice in the news. 2 million air fryers recalled in U.S., Canada, Mexico for fire risk.

Drop me your comments below, tag me on Instagram and don’t forget you can now get my cookbook – The Vibrant Caribbean Pot, 100 Traditional And Fusion Recipes @ CaribbeanPot.com/CookBook/

Gluten Free Seafood

Succulent Oven Jerk Shrimp.

Once again I’m sharing a ‘Jerk’ recipe and I feel compelled to mention as I always do… yes authentic Jamaican Jerk (anything) is a combination of the jerk marinade and the technique of grilling over pimento wood. I am based in Canada and it’s the middle of winter, so it’s all about using the indoor oven as best we can. Save the idiotic comments please.

You’ll Need…

3-4 large shrimp (cleaned)
1 tablespoon Jamaican jerk marinade
2 1/2 tablespoon olive oil (divided)
1 1/2tablespoon honey
1/2 teaspoon black pepper
4-8 sprigs thyme
3 scallions (divided)
1 lemon (juice)
1 tablespoon parsley
1 teaspoon grated ginger
1 clementine (juice)

Important! If doing this recipe gluten free, please read the full list of ingredients to make sure they meet with your specific gluten free dietary needs. Especially the Jerk Marinade you use as most will contain soy sauce and potently other gluten ingredients.

Preheat your oven to 525 F (broil). As the oven comes up to temperature, clean and wash the shrimp (or lobster tails) with the juice of 1/2 the lemon and cool water. Split the shrimp down the middle and devein, but be sure to leave the shell on. Yea, some of you may call these prawns.

It’s time to make the sort of dressing to cover the split shrimp with. In a bowl, combine 1 1/2 tablespoon olive oil, the jerk marinade (yes I used store bought, but you can use the recipe I have on here to make your own), ginger, black pepper, juice of the clementine (or orange juice), 1 scallion chopped finely, honey and black pepper.

In a roasting tray (I used a cast iron pan), drizzly on the remaining olive oil (or line it with foil for easier cleanup after), then lay out the shrimp shell side down and pour the jerk marinade onto the exposed flesh.

Tuck the thyme and remaining scallions between the shrimp, so as it roasts in the oven you’ll get a further herbal perfume in the air. NOTE! You can sprinkle some salt and black pepper (if you want) onto the shrimp before dressing them with the jerk marinade.

Now into the oven for 6-8 minutes, depending on how large the shrimp are that you use.

I had the pan on the middle rack for the first 4 minutes, then the top rack the final couple mins. As soon as I took it out of the oven, I drizzled on the remaining lemon juice and chopped parsley.

Who said you couldn’t do brilliant Jerk Shrimp in the Oven? Feel free to use your outdoor propane or charcoal grill if you prefer. The use of the honey and clementine juice will give it a lovely undertone of sweetness (jerk marinade can be spicy) and citrus.

Drop me your comments below, tag me on Instagram and don’t forget you can now get my cookbook – The Vibrant Caribbean Pot, 100 Traditional And Fusion Recipes @ CaribbeanPot.com/CookBook/


Gluten Free Meat & Poultry Seafood

Jamaican Jerk Dry Rub.

Here’s my take on a classic Jamaican Jerk Dry Rub! A recipe I’ve tailored to my own taste, as you won’t see any Paprika (as in many recipes online) and to be honest with you, dried thyme is NOT my fav. However it’s a key ingredient in any Jamaican jerk rub or marinade you’ll ever come across, so I included it.

You’ll Need…

3 tablespoon Pimento Berries (allspice)
4 tablespoon Cane Sugar
3 tablespoon black pepper
3 tablespoon ground cinnamon
3 tablespoon ground nutmeg
3 tablespoon dehydrated onion flakes
3 tablespoon dehydrated garlic
3 tablespoon ground ginger
4 tablespoon dehydrated scallions (or chives)
1 1/2 tablespoon scotch bonnet pepper flakes
6-10 bay leaves
3 tablespoon dry rubbed thyme

Note! To add a smoky undertone (if you won’t be using a smoker or grilling over charcoal), the smoked Paprika I mentioned that I didn’t use above, will work. NO, regular pepper flakes will NOT give you the same effect as the Scotch Bonnet pepper flakes. But if that’s all you can source, so be it.

I find that by crushing the Pimento (allspice) berries, it gives the finished rub a much deeper flavor. However, the ground stuff will work, if you don’t want the work or you don’t have a heavy mortar and pestle.

The addition of the Bay Leaf compliments the Pimento Berries as the have the same flavor profile, so I’d recommend using them. Those I crushed also. A spice grinder will also work.

To be honest, that’s the only real work involved in putting this wicked Jamaican Jerk Rub together. Basically all you have to do now is place all the ingredients in a large bowl and mix well to combine.

Use fresh or store in a airtight glass jar. I prefer a glass jar as the flavors of the rub is very strong and can leave a scent-stain on plastic containers. Store in a cool, dry/dark place in the airtight jar and it will last you a few months easily. Give it a good shake before using next.

Do keep in mind that I didn’t use any salt in this rub as I much prefer to control that, depending on what I’ll be using the rub on. Speaking about use, it can be used on vegetables, fish, shrimp, pork, chicken (poultry) and lamb.

My fave is smoked/grilled dry rub chicken. Trim the excess skin and fat off chicken pieces, dust generously with the Jamaican Jerk Dry Rub, allow it to marinate for a couple hours (or go directly onto your grill), then grill as you’d normally do.

Circling back on my comment above about dried thyme… while I’m no fan of it, fresh thyme out of my garden is my JAM! I can use that herb on everything I cook.

Do keep in mind that this will be SPICY and if you use your hands to rub onto whatever you’re grilling, wash with soap and water immediately after.

Drop me your comments below, tag me on Instagram and don’t forget you can now get my cookbook – The Vibrant Caribbean Pot, 100 Traditional And Fusion Recipes @ CaribbeanPot.com/CookBook/

Meat & Poultry

Phenomenal Honey Oven Jerk Chicken.

Following up on the Outstanding Honey Jerk Marinade I shared a couple weeks back, I thought it was only appropriate that I show you how to put it to use. While I did this version in the oven (it was the middle of winter when I documented the recipe), you can also rock this on your outdoor grill this BBQ season.

You’ll Need…

4-5 lbs chicken drumsticks
1 teaspoon salt
1 1/2 cups Honey Jerk Marinade (divided)
2-3 tablespoon Honey (I used raw organic)
1 lime (juice)

In a large bowl with the cleaned chicken, add the lime juice, salt and 3/4 cup of the Honey Jerk Marinade. Allow to marinate in the fridge for at least 2 hours – overnight will give best results. Feel free to put this in a strong zipper bag.

Pre-heat your oven to 375 F and line your baking tray with parchment or foil to make cleanup easier when you’re done. I also sprayed some baking spray on the wire rack I was using (so the chicken won’t stick), Yes, I recommend using a wire rack if you got one, as it will allow the oven’s hot air to circulate the chicken, cooking it evenly.

When you place the marinated chicken on the rack, try to have some space between each piece. Then into that 375 F oven onto the middle rack. 30 minutes later, flip them over and cook for another 20 minutes.

Mix the honey with the reserved honey jerk marinade, to intensify the honey flavor in the completed jerk chicken.

After 50 minutes remove the chicken from the oven, put the oven to 400 F and brush on some of the honey/jerk marinade. Back into the oven for 20 minutes, brushing on the sort of glaze every 5 minutes. So a total of 2 times on each side of the chicken pieces.

Then to give it that punch of color I went in for 3 minutes on the “Broil” setting (550 F) – be mindful to keep an eye at this point as the high heat and sugars in the glaze could BURN easily.

At no point did I cover these with foil, in case you’re wondering. Yes any cut of chicken will work, but you’ll have to adjust the cooking time according to the size of each piece. The drippings under the rack will also be DYNAMITE!