/chris de la rosa (Page 75)
Desserts Vegetarian

Papaya Pineapple Marmalade Recipe

Papaya Pineapple Marmalade (9)

With the natural abundance of fruits we have in the Caribbean I’m surprised we didn’t have a wider jam and jellies culture, when I was a kid on the islands. To be honest, the only jam mom would make was guava, sour cherry and  Pommecythere  (ambarella). However with all the artisan -like initiatives lately, we’re seeing more and more creative use of our fruits. We’ve come to realize that we can still enjoy tropical fruits when it’s out of season. If you’re from the Caribbean you’ll know exactly what I mean when I say we eat ‘seasonally’…  take sorrel for example. We only drink sorrel at Christmas time. Why? In this recipe we’ll take two of the most common topical fruits and make what I believe is the perfect marriage of flavors and texture.

You’ll Need…

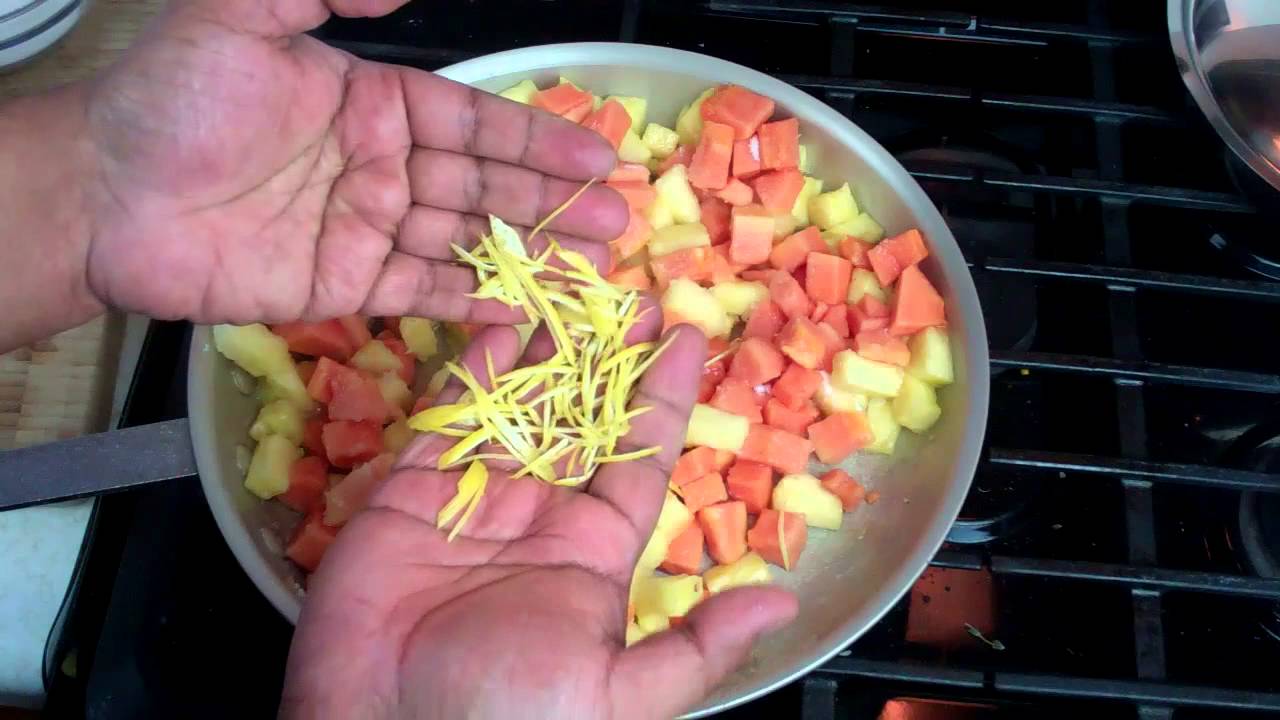
2 cups diced ripe pineapple
2 cups diced ripe papaya
3-4 cups sugar (taste and add all 4 if necessary)
1 tablespoon lemon zest (in thin strips)
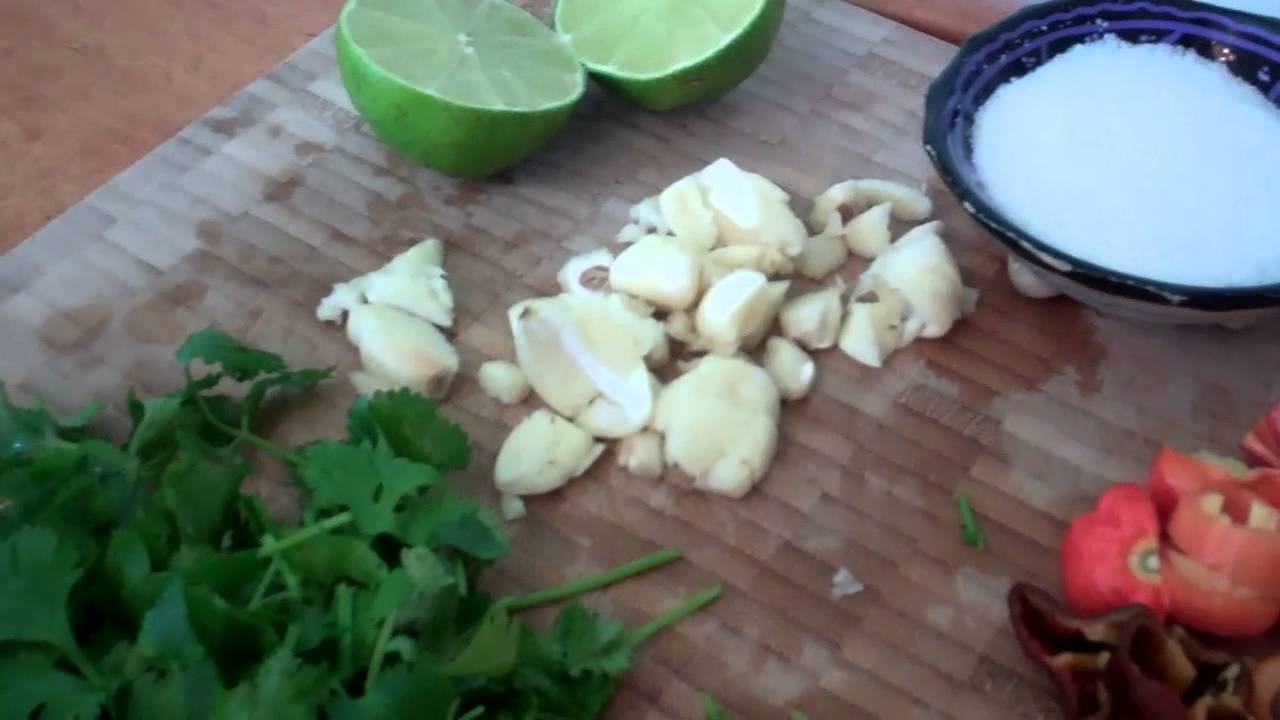
1 /3 cup lemon juice
1 tablespoon grated ginger
pinch salt
tablespoon honey

Papaya Pineapple Marmalade (1)

Peel and cube the pineapple and papaya (Click to watch how shop, peel and cube a papayaClick to watch how to peel, core and cube a pineapple) and set aside. Then using a pairing knife, cut off some of the rind off the lemons and slice them thinly (Chiffonade). You’ll also need to squeeze the lemons as we’ll need this citrus kick in the marmalade.

Papaya Pineapple Marmalade (2)

Papaya Pineapple Marmalade (3)

Place a wide pan on a medium flame and add all the ingredients and bring to a boil.

Papaya Pineapple Marmalade (4)

Papaya Pineapple Marmalade (6)

Reduce the heat to a simmer (leave the pan uncovered) and have it go for about 30 minutes. The goal is to make everything tender, to the point where it starts to break apart.

Papaya Pineapple Marmalade (7)

It will go thick and sticky (that’s what we want) and you can certainly control the texture. If you want it more runny, you can cook it for a bit less time and if you want it thick, using the back of your spoon, mash down on the pieces of fruit. If you’re an exact cook time type of person, you want to achieve 224º degrees Fahrenheit on a candy thermometer.

Pour into a sterilized glass jar, store and enjoy.

Papaya Pineapple Marmalade (8)

This is a great way to put such wonderful tropical fruits to use. Remember this is not diabetic friendly and overall very sweet.

Recipe Card

Papaya Pineapple Marmalade

Difficulty: Beginner Prep Time 10 mins Cook Time 30 mins Total Time 40 mins
Servings: 4

Description

A vibrant tropical spread that blends papaya and pineapple into a sticky-sweet marmalade with warm notes of ginger and citrus.

Ingredients

Instructions

Video
  1. Prepare fruit by peeling and dicing pineapple and papaya. Zest and juice lemons.
  2. Combine all ingredients in a wide pan over medium heat.
  3. Bring mixture to a boil, then reduce to a simmer; cook, uncovered, about 30 minutes until fruit is tender and mixture thickens.
  4. Adjust thickness by simmering more if needed or mashing a few pieces with your spoon.
  5. (Optional) Check for set at 224 °F (107 °C) using a candy thermometer.
  6. Remove from heat and pour hot marmalade into sterilized jars; seal once cool.
Tell us what you think
Seafood

Firecracker Shrimp Wantons Recipe.

firecracker shrimp (10)

At a recent dinner party I was challenged by friends to come up with a firecracker shrimp recipe, but with a Caribbean twist. Being that “challenge” is my second name.. I’m very competitive, a few days later I was in the kitchen loaded with ingredients to take that firecracker shrimp we enjoyed to a whole new level. They were good, but missing were a herbal note and true Caribbean sunshine (heat). Don’t call something ‘firecracker’ when there’s no actual heat but the sort of vinegar based hot sauce they market in North America. According to a pardna..”dem thing juss sour!.. no real heat”.

You’ll Need…

12 large shrimp (cleaned / deveined)
12 wonton wrappers (or 6 spring roll wrappers)
2 cups veg oil for frying
1 to 2 tablespoon pepper sauce (sriracha if that is your thing)
1 teaspoon Caribbean green seasoning
1 tablespoon ketchup
1 tablespoon Soy Sauce
1/4 teaspoon Sesame Oil
1/2 lime (juice and zest)
1 tablespoon white sugar

Tip: to straighten the shrimp (from natural curve) make 2 small cuts on the inside of the curve on the shrimp so they are easier to wrap and will not curl when you fry them.

After you’ve cleaned and de-veined the shrimp.. do leave on the tail ends for presentation and get ready to marinate. Add all the ingredients mentioned above except the veg oil and wrappers, mix well and marinate for 10 minutes.

firecracker shrimp (1)

firecracker shrimp (2)

firecracker shrimp (3)

It’s now time to wrap up these into succulent little packages in the wonton wrappers and fry them till golden brown. If you’re using spring roll wrappers, which are considerably bigger than wonton wrappers, cut them in half  (in two triangles). To better understand the wrapping process it may be best if you watch the video below.  Basically  I dip my finger in the same marinade (you can use water) and run it along the edges of the wrapper so the moisture helps to seal it. Wrap each shrimp in the wrapper, with the tails exposed.

firecracker shrimp (4)

firecracker shrimp (5)

firecracker shrimp (6)

Heat the oil on a medium heat in a wide pan, then gently add about 4-6 to the now hot oil. Please don’t crowd the pan. Takes about 3-5 minutes to fully cook, but do remember to flip them so they brown on all sides. Simply remove out of the oil, place on paper towels to drain off the extra oil and continue frying the rest.

firecracker shrimp (7)

firecracker shrimp (8)

firecracker shrimp (9)

Try to serve warm to really get the rich flavors of the Caribbean bursting in your mouth as you tuck into them. I like serving it with a basic homemade peppers sauce!

firecracker shrimp (11)

If you make these in advance, you can reheat them when your guests arrive in your oven on a low heat (do NOT microwave). If that is the plan, I would recommend not cooking them fully when you originally fry them as you don’t want to shrimp to go like rubber on you.

Back to the dinner party and the challenge.. I’ve noticed that since I’ve been getting a lot of recognition for my escapades in the kitchen through all forms of media and with the recent success of my cookbook.. people are scared to host me now. They’re intimated to have me eat anything they have cooked.

Gluten Free Seafood

String Beans With Shrimp In A Rich Caribbean Curry.

curry shrimp with beans (11)

When you grow up in the ‘country’ areas on the islands, you’re sure to have a kitchen garden where most of the vegetables, herbs and peppers you use in in the kitchen, comes directly from. My brother and I were gardeners from a very young age (not by choice.. especially when we wanted to run football and not tend to plants). Looking back, it seems we always had some sort of beans planted in that small plot of land at the back of our home. Maybe this is where my love for beans of all types originated? In this recipe we’ll use two of my favorite ingredients, string beans and shrimp along with that curry base, this will definitely be delightful.

You’ll Need…

1 lb shrimp
1 teaspoon Caribbean green seasoning
1 teaspoon veg oil (marinating the shrimp)
1 tablespoon veg oil
1/2 cup water
1/2 cup diced bell pepper
1/4 scotch bonnet pepper
3 cloves garlic
1/2 medium onion
1 heaping tablespoon curry powder
2 lbs string beans (any type of green beans)
1/2 teaspoon salt (adjust accordingly)
1/4 teaspoon black pepper

Note: You can use bodi (yard beans), French beans or just about any green beans you enjoy! If doing this recipe gluten free, please go through the entire ingredient list to make sure they meet with your specific gluten free dietary requirements. Be mindful that most curry powder may have flour as a filler, so do read the label.

curry shrimp with beans (1)

Trim the edges off the beans, cut into 1 1/2 inch pieces and wash/drain. Dice the peppers, onion and garlic. Remember when handling scotch bonnet peppers you must wash your hands with soap and water immediately after. Peel and devein the shrimp, then season with the green seasoning and the teaspoon of vegetable oil and set aside to marinate for about 10-15 minutes.

curry shrimp with beans (2)

Heat a wide pan on medium heat, then add the seasoned shrimp and cook for about 3-4 minutes. Then remove from the pan and set aside as we don’t want to overcook the shrimp (they will go rubbery).

curry shrimp with beans (3)

curry shrimp with beans (4)

Burn off any liquid in the pan, then add the tablespoon of veg oil and go in with the diced onion and garlic. Turn the heat down to low as we don’t want to burn the garlic but get that lovely flavor out of it. Cook for 3-4 minutes.

curry shrimp with beans (5)

With the heat still on low, toss in the curry powder and black pepper, stir well. In this step we’ll toast the curry to release the rich flavors of the spices which makes up the curry blend. This step will also cook-out the sort of raw curry taste.

curry shrimp with beans (6)

The curry will go dark and grainy.. that’s exactly what we’re looking for. Turn the heat up to medium and add the trimmed string beans as well as the scotch bonnet pepper. Mix well to get all that lovely curry goodness from the bottom of the pan. Now add the water, cover the pan and bring it up to a boil. When it comes to a boil, lower the heat to low, cover the pan and cook for about 12 minutes. Don’t forget to add the salt at this point as well.

curry shrimp with beans (7)

curry shrimp with beans (8)

At this point it’s time to go in with the previously cooked shrimp and diced bell peppers and turn up the heat to burn off any liquid at the bottom of the pot. Taste for salt (adjust accordingly) and cook longer (or less) depending on how you like your beans cooked. To stretch this dish you can also add some diced tomato near the end.

curry shrimp with beans (9)

curry shrimp with beans (10)

You should have plump and juicy shrimp, tender beans and that curry will bring it all together. For a more rich flavor you can use coconut milk instead of water in the cooking process. You may notice that I included some of the seeds of the scotch bonnet pepper.. be mindful that will increase the heat level as most of the heat in such hot peppers are in the seeds and white membrane surrounding the seeds.


Gluten Free Vegetarian

Gluten Free Vegetarian Pelau Recipe.

vegetarian gluten free pelau (12)

With the increase in demand for both vegetarian and gluten free recipes, I thought I’d take one of the most traditional dishes of the Southern Caribbean and remove a key ingredient – meat! Meat lovers can tune in here for the Chicken pelau video. This one pot dish was a must whenever we’d spend a day at the beach, go to the Oval to watch touring cricket teams and whenever pigeon peas was in season. back then freshly shelled peas were used, but today living in North America I have no choice but to reach for the canned stuff. I assure you, you won’t know there isn’t meat in this dish when it’s done ‘bubblin’ and you serve yourself a plate.

You’ll Need…

1 1/2 cups pigeon peas (1 can)
1 large carrot diced
1/2 cup celery (diced)
2 cups rice (brown par boiled)
1.5 cup coconut milk
2.5 cups water
2 scallions
2 pimento peppers (optional)
2 bird’s pepper (bird’s eye)
1/2 cup diced bell pepper
1 tablespoon parsley
2 sprigs thyme
2 cloves garlic
1/4 teaspoon grated ginger
3/4 teaspoon salt
1 heaping tablespoon brown sugar
1 tablespoon veg oil
1 teaspoon Worcestershire sauce

vegetarian gluten free pelau (1)

Dice, chop and slice the carrot, celery, peppers, scallions and scallions. Drain the can of pigeon peas and rinse with cool water..drain. In a deep pot on medium high heat, add the veg oil, then go in with the brown sugar. As we’ve done with other Caribbean “stewed” dishes, we want to get that rich color and flavor from the caramelized sugar.

vegetarian gluten free pelau (2)

This is the only critical step in making this vegetarian pelau as if it goes beyond the amber/frothy color we’re looking for the finished dish WILL have  sort of burnt taste and we don’t want that. The sugar will melt, then go a rich golden colour, before going frothy and a deep amber color. This is when we want to go in the diced carrot, celery and pigeon peas. TIP: Use a spoon which can withstand high heat (no plastic), make sure the peas are drained well after washing as we don’t want any liquid and the spoon should have a long handle as the melted sugar can jump-back at you. Move around the vegetables and let it cook/brown for about 4 minutes.

vegetarian gluten free pelau (3)

vegetarian gluten free pelau (5)

Now you will have a deep brown base to help color the entire dish (pelau isn’t supposed to be pale..according to my mom). Add the other ingredients, with the rice, coconut milk and water going in last.

vegetarian gluten free pelau (7)

vegetarian gluten free pelau (6)

If you’re new to Caribbean cuisine, you may not know that we wash our rice before cooking. This removes some of the excess starch and any debris that may be in the rice from the mill. You have 2 options. 1 – Place the rice in a strainer and run water through it. Massage and keep rinsing until the water runs clear. Option 2 – place the rice in a deep bowl, cover with water and massage with your hands. the water will go cloudy – drain and repeat until the water is clear.

vegetarian gluten free pelau (8)

Go in with the bird’s eye pepper (leave whole so we get flavor and not the raw heat – remember to remove them before serving). Bring to a boil, then reduce to a gentle boil with the lid on the pot. Stir every 5 minutes and cook for about 25-30 minutes.. until all the liquid is gone. Do remember to taste for salt and adjust accordingly. TIP: If you find that the pelau is pale in color you can go in with a bit Caribbean food browning. There are two ways people like their finished pelau. Grainy rice (my way) or a bit overcooked with the rice being a little mushy or creamy. So adjust your cooking time to accommodate your preference.

vegetarian gluten free pelau (9)

vegetarian gluten free pelau (10)

Besides liking my pelau grainy, it MUST be piping hot – to the point where with every fork full I have to suck air in at the same time to help cool it down or risk burning my mouth. Don’t ask me why – that’s just the way I like it! This vegetarian gluten free recipe is simply outstanding and I assure you meat eaters you will not miss that chicken or salted meats we normally use. Traditionalists will want to reach for that Golden Ray (salted butter) to give it that wicked ‘creole’ taste, but do remember we’re doing this one vegetarian.

vegetarian gluten free pelau (11)

If you’d like to request a recipe, hit me on Twitter @Obzokee and we’ll get to it! If you’re doing this recipe gluten free do go through the complete list of ingredients to ensure they meet with your specific gluten free diet.

Gadget

Otterbox Agility System For iPad And iPad Mini Review.

Agility

One of my favorite tools in the kitchen is not a pot, pan, knife or electric appliance.. though they all make life easier, especially when you blog about food and do recipe videos for a living. My new best friend in the kitchen is the Otterbox Agility System for my iPad mini, as it allows me to not only protect my iPad, but gives me the ability to go hands-free with my favorite recipes, videos and websites. I have three daughters who are all under the Apple spell, so over the years we gone through MANY iPhones… with than experience I know how important it was to protect my iPad after I became the proud owner of one.

In the following video you’ll hear me mention the following:

* OtterBox Agility Shell

* OtterBox Agility Portfolio

* OtterBox Agility Wall Mount

* OtterBox Agility Dock

* OtterBox Agility Power Dock

You can get everything I mentioned above, along with protective cases for your iPad, iPhones and other digital devices at the Otterbox website @ http://www.otterbox.com/


I’m sure your iPad mini was an investment on your part so I encourage you to protect that investment with the Otterbox Agility System.

Gluten Free Sauces & Condiments

Traditional Caribbean Peppersauce (hot sauce) Recipe.

traditional caribbean peppersauce (2)

This is as old school as a recipe could possibly get on CaribbeanPot.com. Not just the recipe but the tool and technique I’ll be using. Before the days of blenders and food processors, we had food mills. Used to grind the dhal for making dhalpuri roti, preparing the dried fruits for making traditional black/rum cake, making homemade pepper sauces, grinding dried corn for making chilli bibbi and various other uses in the kitchen. Luckily my mom brought a mill for me many years back and with the abundance of fiery hot peppers in my garden last summer, I thought I’d dust out the Mr. mill and share this recipe with you all. Hopefully I’ll give you a glimpse into a glorious past.. something we seem to be losing touch with.

You’ll Need…

Hot Peppers (about 4-6 cups chopped)
6 cloves garlic
1/2 cup chopped cilantro
1 teaspoon sea salt
1 cup white vinegar

Note: As mentioned this past summer I had an excellent crop of Scotch Bonnet, Habanero, Chocolate Scotch Bonnet and Trinidad Moruga Scorpions… all deadly peppers. But you can use any 1 or do a mix as I did. Traditionally in the Caribbean we would use Scotch Bonnet peppers for this recipe.

IMPORTANT: Be mindful that these peppers are extremely hot and the oils can cause serious irritation (and pain). Do wear gloves and wash your hands immediately after with soap and water. Do not touch any sensitive areas after handling these peppers.

traditional caribbean peppersauce (4)

 Wash the peppers and trim off the stems and give the peppers a rough chop. For a fiery peppersauce leave the seeds, if not do remove them if you wish to tame things down. Give the cilantro (traditionally in the Caribbean you’d use Chadon beni) and garlic a rough chop as well.

traditional caribbean peppersauce (5)

traditional caribbean peppersauce (6)

Now it’s time to set up the mill on a sturdy work bench (I used the desk in our kitchen). Assemble the mill, then adjust the settings at the back (2 screw-like things) to control the texture of the ground pepper. Once you start turning the handle with the peppers in the catchment area you’ll be able to better determine the coarseness you want. When clamping down the mill to your work surface I would recommend using a piece of cloth or paper towels to protect the area from getting damaged as you tighten it.

Place a deep bowl under the area where the ground peppers will fall, then start adding a mixture of the garlic, peppers and chopped cilantro into the mill and start cranking. Keep a wooden spoon handy as you may have to press down on everything for it to work through the mill. (watch the video below).

traditional caribbean peppersauce (7)

traditional caribbean peppersauce (8)

traditional caribbean peppersauce (9)

Remember this is when you can adjust the coarseness.. so adjust accordingly.

traditional caribbean peppersauce (10)

I would even recommend using safety goggles when cranking and pushing down on the peppers in the event you get hit in the eye with any of the juices. To finish up all you have to do is mix in the vinegar, salt and lime (or lemon) juice and mix well with the ground peppers.

traditional caribbean peppersauce (1)

This recipe is as traditional and basic as you can get when it comes to peppersauce in the Caribbean. You can now get creative and add other ingredients like papaya (green), bitter melon, carrots and other herbs. Since we used vinegar this pepper sauce can remain on your kitchen counter as the vinegar will act as a preservative. For a longer shelf life you can certainly keep it in the fridge, but I’ve noticed that when you leave hot sauces in the fridge it somehow tames the heat factor! Store in a clean glass container.

Back in the day I remember my Uncle B (I spoke about him in my cookbook) would handle all the peppers with his bare hands and he’d be cool with it. My man hand hands of steel.. and everyone sought his help when they were making peppersauce!

Recipe Card

Traditional Caribbean Pepper Sauce

Ingredients

Instructions

Video
  1. Wash the Scotch Bonnet Pepper (6 cup) and trim off the stems.
  2. Give the peppers, Garlic (6 clove) and Fresh Cilantro (1/2 cup) a rough chop.
  3. Place a deep bowl under the area where the ground peppers will fall, then start adding a mixture of the garlic, peppers and chopped cilantro into the mill and start cranking. Keep a wooden spoon handy as you may have to press down on everything for it to work through the mill.
  4. Adjust coarseness based on your preferences.
  5. Continue grinding until everything has been passed through.
  6. Finally mix in the Distilled White Vinegar (1 cup), Sea Salt (1 teaspoon), and juice from the Lime (1) with the ground peppers.
  7. Since vinegar was used, this pepper sauce can remain on your kitchen counter as the vinegar will act as a preservative. For longer shelf life, you can certainly keep it in the fridge. Enjoy!
Tell us what you think