My passion for peppersauce (homemade hot sauces) is fueled by having been surrounded by very creative peppersauce makers even as a little boy on the islands, but more importantly… my daughters possess the same sort of intense affection for the fiery stuff as I do. There’s no better motivation than having those close to you share the same traits, so when you get creative in the kitchen, you know it’s something you will connect with as a family. With the use of the Trinidad Moruga Scorpions which at the time of making this sauce is the 2nd hottest pepper in the world, you’re getting a hot sauce which should be used with extreme caution. But I find that by using the blueberries, you get a lovely fruity roundness.
You’ll Need…
6 scorpion peppers
2 cups blueberries
2 oranges (juice)
2 scallion
1/4 brown sugar
1 lime (juice)
1/2 cup vinegar
optional – honey – cinnamon – allspice
Note: If doing this recipe gluten free, please go through the entire list of ingredients to make sure they meet with your specific gluten free dietary needs.
IMPORTANT! Be sure to wear gloves when handling the peppers and wash your hands immediately after with soap and water. I would also recommend having your kitchen window open and the stove exhaust fan on while cooking the sauce.
Give the peppers and scallions, a rough chop.. include the seeds if you REALLY want the HEAT! Then place all the ingredients in a saucepan on a low heat and bring to a simmer. Cook/simmer for about 15-20 minutes. Then allow to cool before you place in the blender or food processor.
The blueberries will breakdown along with the peppers and the other ingredients will incorporate for a very tasty (but HOT) chunky sauce as this point. As mentioned above, allow it to cool then place it all in a blender and puree to a smooth sauce.
Place in a glass container and store in the fridge! I know you’re thinking.. “but Chris, blueberries is NOT Caribbean!”.. Agree.. but I tend to use the fruits (ingredients) I’m now surrounded with.. and to be quite honest, you’ll be amazed at how wonderful this peppersauce is. Great on grilled meats, burgers, hotdogs and a few drops on your sausage and eggs in the morning!
Spinach dip is not something you reach for when you think traditional Caribbean snacks or fete (party) food, but you’re now finding it served at many of the restaurants in the major tourist destinations and capital cities throughout the islands. It’s no secret that we love cheese in the Caribbean and the same can be said for any type of “greens” like spinach, so it’s only natural that this recipe would show up on this website sooner rather than later. I must confess that this 4 cheese spinach dip is a hybrid of my daughters Kieana’s recipe, which I tweaked and kinda called my own?
You’ll Need…
2-3 cups chopped spinach (frozen/thawed)
1 bird pepper (deseed)
3/4 cup diced bell pepper
1 tablespoon parsley
2 cups cheddar
1 cup cream cheese
1/2 cup Romano
1/2 cup Parmesan (optional)
1/2 cup Asiago
1 clove garlic (finely diced)
1 tablespoon lemon juice
3 scallions chopped
* 1 tablespoon veg oil or cooking spray for greasing the baking container.
Note: You’ll notice that I said that this is a 4 cheese dip but I went in with 5 cheeses… the Parmesan is optional. Also, besides the cheddar and cream cheese, you can use your fav type of cheeses.
Grate the cheeses, dice the bird’s eye pepper (no seeds), garlic, bell pepper (any spicy pepper will work), scallions and finely chop the parsley. I used frozen chopped spinach, so allow it to thaw completely then squeeze out all the liquid from it (there will be a lot). Then place all the ingredients in a large bowl and give it a good mix. I find that with spinach I get a sort of itch at the back of my throat, so the lemon juice will definitely help with this.
IMPORTANT! Reserve some of the grated cheddar and Asiago to use as a topping before placing in the oven.
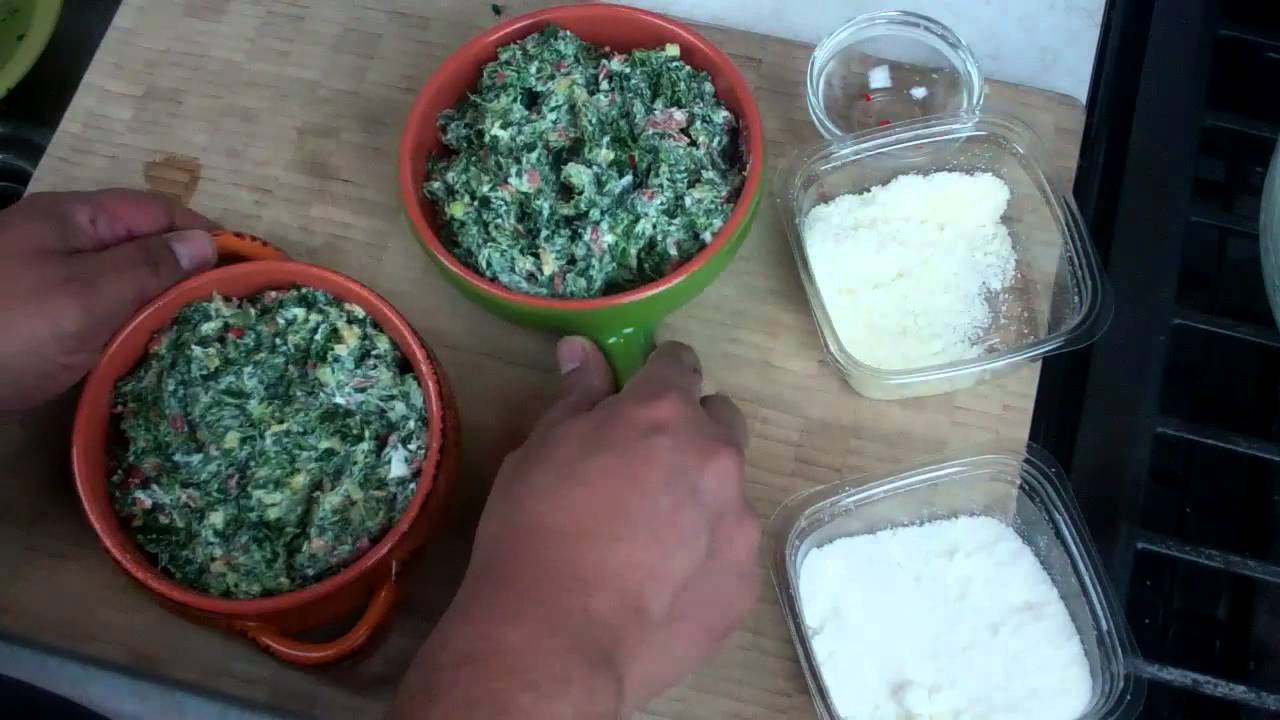
You have the option to use one large oven-proof dish or in my case I’m using two smaller dishes. One I’m making at this moment and the other I will seal with plastic wrap, place in a freezer bag and keep in the freezer for making another time. Grease both containers with the vegetable oil and divide the spinach filling equally.. then top with the cheeses we reserved. Preheat your oven to 375 F.
This is an ideal spinach dip for students living in dorm as it can be done in a toaster oven, if you don’t have access to a full oven. Let it go for between 25 and 30 minutes.. line the bottom of your oven with tin foil in case we have some of that cheese bubble over! Don’t be surprised if your friends keep asking you to make this four cheese spinach dip time and time again. The cheesy goodness along with the slight kick from that bird pepper is quite addictive!
* When doing the 2nd spinach dip we saved in the freezer do it at 350 F for about 35 minutes from frozen.. but depending on your oven you may need to have it go for an extra 5 minutes.
Salsa is not a “Caribbean” type dish! Really? How easily we forget the Spanish speaking Caribbean, like Dominican Republic, Cuba and Puerto Rico. I started making this take on salsa for my girls after I read the label of the pre-packaged stuff they were buying at the grocery stores. Called salsa, but lacked any real flavor and loaded with sodium and preservatives. You’ll notice that I’ve taken the technique we use in Trinidad and Tobago for making Tomato Choka and applied it in making this salsa.. for what I believe is the best salsa you’ll ever have/enjoy! Ask my daughters and their friends.
You’ll Need…
3 Roma tomatoes
3 scallions
1 green scotch bonnet pepper
3 cloves garlic
1/2 med avocado (ripe)
1/2 green scotch bonnet pepper
1 pint cherry tomatoes
1 heaping tablespoon chopped cilantro
1/2 lemon (juice)
1 tablespoon olive oil
1/3 teaspoon sea salt
1/4 teaspoon black pepper
I’d much prefer to use my outdoor grill to fire-roast the scallions, pepper and tomatoes, but with it being sill cold outside (long winter) and since I know many people don’t have access to open flame grilling, I thought I’d use my cast iron pan on the stove top. Simply drizzle some vegetable oil on the pan (or use a non stick pan) and have it on a medium flame. Char the scotch bonnet pepper and scallion and set aside, then add the Roma tomatoes (I like using those as they are more meaty and less acidic) and grill on all sides till cooked all the way through – about 10 mins.
Dice the cherry tomato (raw) or you can use another couple Roma tomatoes.. I used cherry as I like the sweetness of them and add to a large bowl along with the chopped grilled scallions.
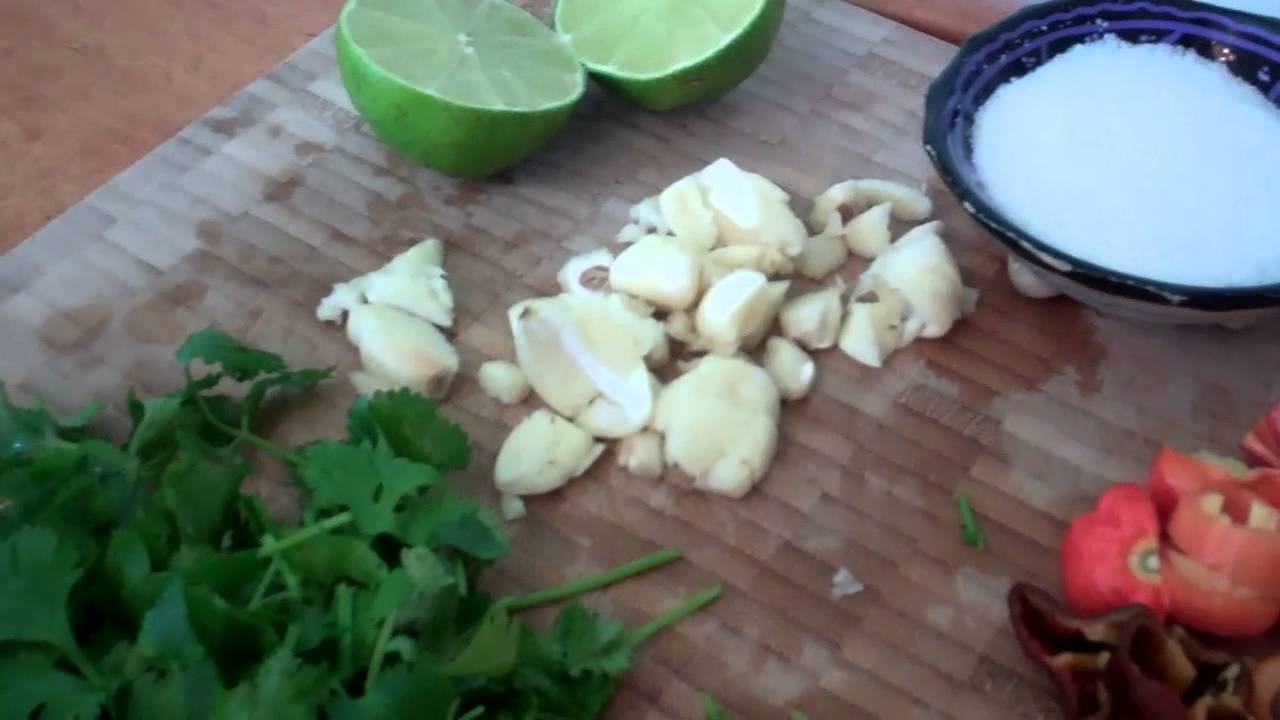
Using a mortar and pestle add the charred scotch bonnet (don’t add any seeds if you’re concerned about the raw heat and do wear gloves when handling them), the sea salt and garlic. Crush to a paste. By now the tomatoes should be fully roasted. you can remove the skin or leave them for a wicked kick of roasted flavor in the finished salsa. Crush the tomatoes as well.. to a chunky paste.
Add this crushed mixture to the bowl and mix well. It’s now time to bring everything together.. dice the avocado and add it along with the lemon juice, cilantro, black pepper and olive oil. Fold gently as not to over-crush the avocado. The goal is to have some texture from the avocado and diced tomato to balance the sort of thick sauce from the crushed roasted tomatoes. The slight kick from the scotch bonnet, the onion and garlic flavors and the roasted tomatoes will truly excite your taste buds. Not to be outdone, the herbal note from the cilantro will definitely have you and your guests wanting more.. so double up on the recipe as a precaution!
Serve fresh for best results, but you can make this in advance.. store in the fridge. I notice that the odd time it does not devoured immediately by my girls, it breaks down after three days in the fridge (discolor). Instead of lemon juice, lime would give it a lovely hint of citrus as well.
Kuchela is one of those spicy condiments traditionally made with green mangoes and a must-have topping for ‘doubles’, saheena and pholourie (street food in Trinidad and Tobago). Being that I call Canada home and green mango is not something I can go in my back yard and pick off the trees as I did for my mom when I was a young fella on the islands, Granny Smith apples are my new choice. Though sweet, the slight tartness and sturdy texture of these green apples makes an ideal kuchela when you can’t source mangoes.
You’ll Need…
5 green apples (Granny Smith)
3/4 teaspoon salt
4 cloves garlic
3-4 tablespoons amchar masala
3/4 cup veg oil
2 scotch bonnet peppers
Notes: You can purchase the amchar masala at most West Indian markets and there are times you can get it on Amazon.com. Grate with the skin on for additional texture, but be sure to get apples which are not covered in wax as they are sometimes.
Please remember to wear gloves and wash your hands with soap and water immediately after handling scotch bonnet peppers. Dice the peppers finely, including the seeds for more heat. You have the option of dicing or crushing the garlic. Then using the sort of shred side of your grater, grate the apples until the core.
You now have two option, you can squeeze off all the liquid from the grated apples, but if you want a more saucy kuchela you can remove about half the liquid. It may take a bit of work to squeeze off the liquid with your hands, or you can use a towel and wring the liquid out.
When making traditional mango kuchela, we try to get all the moisture out of the grated mango and it’s then spread onto a kitchen towel and placed in the open sun for a couple hrs to dry off. This process makes it easy to infuse the grated mango with the Kuchela flavors. In this recipe we’ll cook everything on the stove top for a few minutes to replicate that sort of infusion we need for this to be a great kuchela.
In a wide saucepan on a LOW heat, heat the vegetable oil, then go in with the diced pepper and garlic. Let that gently cook for about 3-5 minutes. Be sure to turn the fan above your stove on or at least open your kitchen windows. The cooked peppers will give off a strong (choking) scent.
Now add the amchar masala, cook for a minute, then add the grated apple and salt. Mix well, cook for 2-3 minutes and you’re done!
Traditionalists will be able to identify the natural sweetness of the apples, but I assure you that this apple kuchela is just as exciting as any I’ve had on the islands and that sweetness adds a lovely overall roundness to the kuchela as it ages for a few days. You can store these in sterilized glass containers on your kitchen counter for a couple weeks, then store in the fridge.
The key to making traditional baigan (eggplant) choka (dip) is roasting the eggplant over an open flame and if you really want to excite the taste buds with even more flavor, you would place the eggplant on hot coals. On so many levels this is not always possible, especially if you live in temperate climates where having that fire in the middle of winter is not possible. Yes, you can always use the flame on your stove top, but if you’ve ever had to clean up that stove after – you’d never do it again. This baigan choka recipe is specifically for people who want the same sort of flavors, but with an easier method of achieving this. Students, you can even do this is a toaster oven.
You’ll Need…
2 med eggplant (about 2-3 lbs)
1/4 teaspoon salt
2 tablespoon olive oil
1 teaspoon veg oil
2 cloves garlic (divided)
1 scotch bonnet pepper
1 small onion
* If you didn’t already know, baigan is just another name for eggplant. This dish is both vegetarian and gluten free. Be sure to go through the entire list of ingredients to ensure they meet with your specific gluten free dietary requirements.
Set your oven to the broil setting (525 F) and as it gets to temp, lets prepare the eggplant. Trim off the stem area, make some slits in the eggplant and for maximum flavor.. slice one of the cloves of garlic thinly and place them into the slits in the eggplant.
Line a sturdy baking tray with tin foil so you won’t have a mess to clean up after. Place the eggplant and WHOLE scotch bonnet pepper and drizzle with the vegetable oil on the eggplant. Using your hands rub the oil around the eggplant and place it in the oven.
After 5 minutes, remove the scotch bonnet – it should be slightly charred now. In a heavy bowl (or mortar and pestle) place the scotch bonnet (remove the stem), remaining clove of garlic and salt and pound to a smooth paste. Remember to wash your hands with soap and water after handling such hot peppers. TIP – I used a slightly mature scotch bonnet so I get a tamed heat. Remember you can control the heat level by how much scotch bonnet you choose to use.
After 25-30 mins at 525 F your eggplant should be perfectly cooked. Remove from the oven and slice down the center and using a table spoon, scoop out all that goodness and place in the same bowl we have the crushed pepper / garlic / salt.
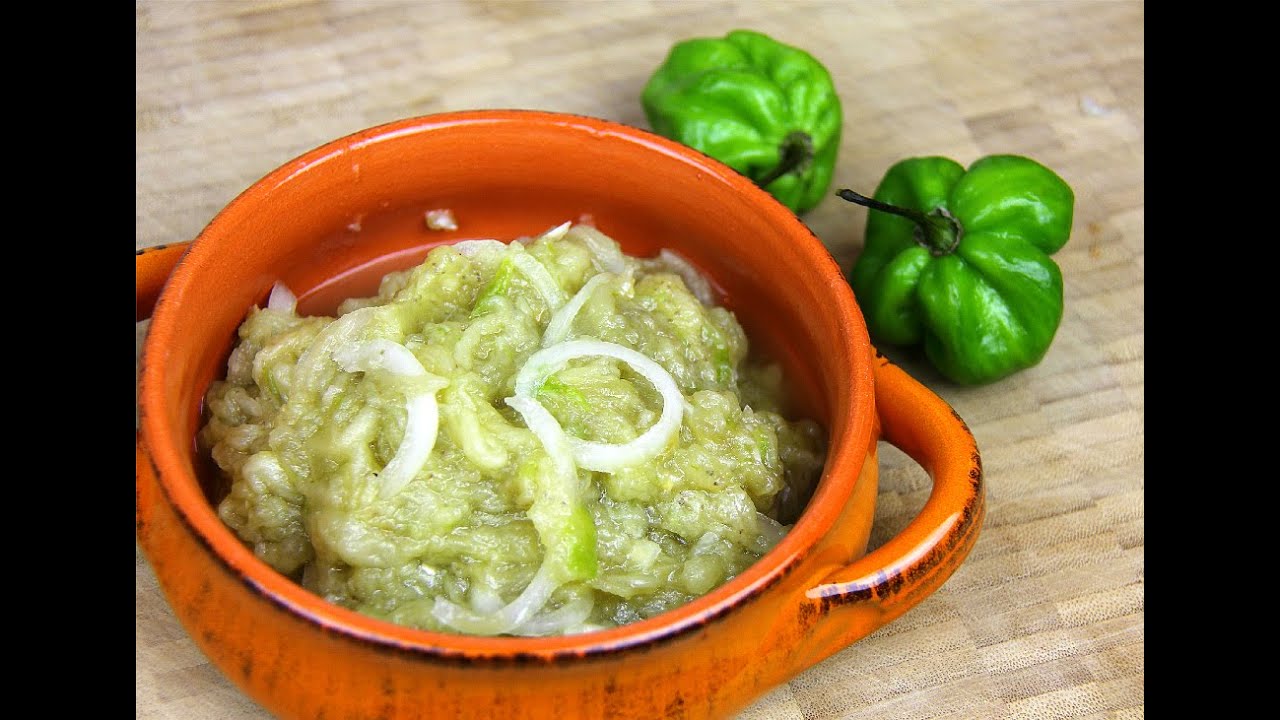
Now crush the eggplant you scooped out until it’s somewhat smooth (you can do all of this with your mortar and pestle – I used a traditional “ponga”). Heat the olive oil in a small frying pan just until you start seeing smoke. In the meantime thinly slice the onion and place it on top of the eggplant mixture (do not mix it yet). Now pour the heat oil onto the onion (this is called chunka). By doing so we do two things. We get the rawness out of the sliced onion and we also pull some flavor out of the onion. Mix well and serve.
This is a dish I love eating with hot sada roti and it’s something my mom makes daily for me when I visit home (Trinidad and Tobago), but you can use any flat bread or use as a dip for any of your favorite potato or corn chips. I hope you give it a try as it’s so simple to do in the oven and I know if you’re old school you’ll miss the smoky flavor of the fire roasted, but the high heat we roast it at in the oven will give it a unique taste.
A classic Trinidadian dish, baigan choka is traditionally made by roasting eggplant over an open flame. This oven-broiled version captures the essence of the original, delivering that smoky flavor with less mess, perfect for those in cooler climates or without access to a grill.
Ingredients
Instructions
Video
Set your oven to the broil setting 525 degrees F (275 degrees C).
Prepare the Eggplant (2). Trim off the stem area, make some slits in the eggplant for maximum flavor.
Slice one of the Garlic (2 clove) thinly and place them into the slits in the eggplant.
Line a sturdy baking tray with tin foil.
Place the eggplant and Scotch Bonnet Pepper (1) and drizzle Vegetable Oil (1 teaspoon) on eggplants. Using your hands rub the oil around the eggplant and place it in the oven for 25 minutes.
After 5 minutes, remove the scotch bonnet – it should be slightly charred now.
In a heavy bowl (or mortar and pestle) place the scotch bonnet (stem removed), remaining clove of garlic and Salt (1/4 teaspoon) and pound to a smooth paste.
After 25-30 minutes, your eggplant should be perfectly cooked. Remove from the oven and slice down the center and using a table spoon, scoop out all that goodness and place in the same bowl as garlic-pepper mixture.
Now crush the eggplant you scooped out until it’s somewhat smooth.
Heat the Olive Oil (2 tablespoon) in a small frying pan just until it starts to smoke.
Meanwhile, thinly slice the Onion (1) and place it on top of the eggplant mixture (do not mix it yet). Now pour the heated oil onto the onion.
This is as old school as a recipe could possibly get on CaribbeanPot.com. Not just the recipe but the tool and technique I’ll be using. Before the days of blenders and food processors, we had food mills. Used to grind the dhal for making dhalpuri roti, preparing the dried fruits for making traditional black/rum cake, making homemade pepper sauces, grinding dried corn for making chilli bibbi and various other uses in the kitchen. Luckily my mom brought a mill for me many years back and with the abundance of fiery hot peppers in my garden last summer, I thought I’d dust out the Mr. mill and share this recipe with you all. Hopefully I’ll give you a glimpse into a glorious past.. something we seem to be losing touch with.
You’ll Need…
Hot Peppers (about 4-6 cups chopped)
6 cloves garlic
1/2 cup chopped cilantro
1 teaspoon sea salt
1 cup white vinegar
Note: As mentioned this past summer I had an excellent crop of Scotch Bonnet, Habanero, Chocolate Scotch Bonnet and Trinidad Moruga Scorpions… all deadly peppers. But you can use any 1 or do a mix as I did. Traditionally in the Caribbean we would use Scotch Bonnet peppers for this recipe.
IMPORTANT: Be mindful that these peppers are extremely hot and the oils can cause serious irritation (and pain). Do wear gloves and wash your hands immediately after with soap and water. Do not touch any sensitive areas after handling these peppers.
Wash the peppers and trim off the stems and give the peppers a rough chop. For a fiery peppersauce leave the seeds, if not do remove them if you wish to tame things down. Give the cilantro (traditionally in the Caribbean you’d use Chadon beni) and garlic a rough chop as well.
Now it’s time to set up the mill on a sturdy work bench (I used the desk in our kitchen). Assemble the mill, then adjust the settings at the back (2 screw-like things) to control the texture of the ground pepper. Once you start turning the handle with the peppers in the catchment area you’ll be able to better determine the coarseness you want. When clamping down the mill to your work surface I would recommend using a piece of cloth or paper towels to protect the area from getting damaged as you tighten it.
Place a deep bowl under the area where the ground peppers will fall, then start adding a mixture of the garlic, peppers and chopped cilantro into the mill and start cranking. Keep a wooden spoon handy as you may have to press down on everything for it to work through the mill. (watch the video below).
Remember this is when you can adjust the coarseness.. so adjust accordingly.
I would even recommend using safety goggles when cranking and pushing down on the peppers in the event you get hit in the eye with any of the juices. To finish up all you have to do is mix in the vinegar, salt and lime (or lemon) juice and mix well with the ground peppers.
This recipe is as traditional and basic as you can get when it comes to peppersauce in the Caribbean. You can now get creative and add other ingredients like papaya (green), bitter melon, carrots and other herbs. Since we used vinegar this pepper sauce can remain on your kitchen counter as the vinegar will act as a preservative. For a longer shelf life you can certainly keep it in the fridge, but I’ve noticed that when you leave hot sauces in the fridge it somehow tames the heat factor! Store in a clean glass container.
Back in the day I remember my Uncle B (I spoke about him in my cookbook) would handle all the peppers with his bare hands and he’d be cool with it. My man hand hands of steel.. and everyone sought his help when they were making peppersauce!
Wash the Scotch Bonnet Pepper (6 cup) and trim off the stems.
Give the peppers, Garlic (6 clove) and Fresh Cilantro (1/2 cup) a rough chop.
Place a deep bowl under the area where the ground peppers will fall, then start adding a mixture of the garlic, peppers and chopped cilantro into the mill and start cranking. Keep a wooden spoon handy as you may have to press down on everything for it to work through the mill.
Adjust coarseness based on your preferences.
Continue grinding until everything has been passed through.
Finally mix in the Distilled White Vinegar (1 cup), Sea Salt (1 teaspoon), and juice from the Lime (1) with the ground peppers.
Since vinegar was used, this pepper sauce can remain on your kitchen counter as the vinegar will act as a preservative. For longer shelf life, you can certainly keep it in the fridge. Enjoy!