/Meat & Poultry (Page 9)
curry chicken ready to serve
Meat & Poultry

Curry Chicken With Potato And Spinach.

Curry Chicken With Potato And Spinach is a HIT in my home, especially when we have buss-up-shut (paratha) roti to dip into that rich flavorful gravy and scoop tender pieces of chicken with pieces of potato, in the same motion.

You’ll Need…

3 lbs chicken (legs with back) cut into pieces
3 tablespoon olive oil
6 cloves garlic (smashed)
1/2 teaspoon black pepper
1/2 tablespoon Cumin (geera) seeds
1 teaspoon Anchar Masala
3/4 tablespoonsalt (adjust)
1/2 medium onion (diced)
1 Scotch Bonnet Peppers (chopped)
1 1/2 tablespoon curry powder
2 tablespoon Caribbean Green Seasoning
1/2 cup water for cooking out the curry
4 large Potato (cut into 1/4 s)
2 cups water to cook the chicken
1/4 lb Baby Spinach (rough chopped)

Note : Please follow along with the video below as I share tips and give reasoning why my technique may differ from other recipes you may encounter. I used an entire Scotch Bonnet pepper in this recipe, but it’s optional or use as much as you can handle. Do remember to wash your hands with soap and water immediately after handling such fiery peppers.

Before we get started with the curry element of the dish, may I suggest you peel, chop and boil your potatoes in salted water (about 1/2 teaspoon salt – not mentioned in the list above).

All you have to do is bring the potato to a boil, reduce to a rolling boil and cook until they are about 80% cooked. About 10 minutes. Drain and set aside.

In a wide pan on a medium flame, add the olive oil followed by the diced onion. Take the heat down to low, then add the garlic, cumin seeds, black pepper and scotch bonnet pepper. Cook for 3 minutes.

Now add the Caribbean Green Seasoning and stir well to combine and flavor the entire pot. Cook for 2-3 minutes, then add the curry powder.

After 3 minutes, add 1/4 cup water and scrape the pan to release any bits stuck to the bottom. Cook for 3-4 minutes to cook out the ‘rawness’ of the curry. (explained in the video below). Be sure to add the Anchar Masala at this point as well. Should you not have Anchar Masala, add the same amount of ground dry roasted cumin instead.

Turn up the heat to medium high to burn off any liquid in the pot (see the image above, I can scrape separation in the pan) , then add your chicken pieces to the pot and stir well to coat with the delightful curry base we created. Add the salt at this point.

Allow it to cook on medium heat for 3 minutes, then add the pre-boiled potatoes and washed baby spinach to the pot. Top with the 2 cups of water and turn the heat up to bring to a boil. Once boiling, reduce to a rolling boil and cook for 10 minutes.

Since we pre boiled the potatoes (I explained why in the video below) we only need to worry about making sure the chicken pieces are fully cooked. In my case my chicken pieces were relatively small, so it was time to wrap up this dish.

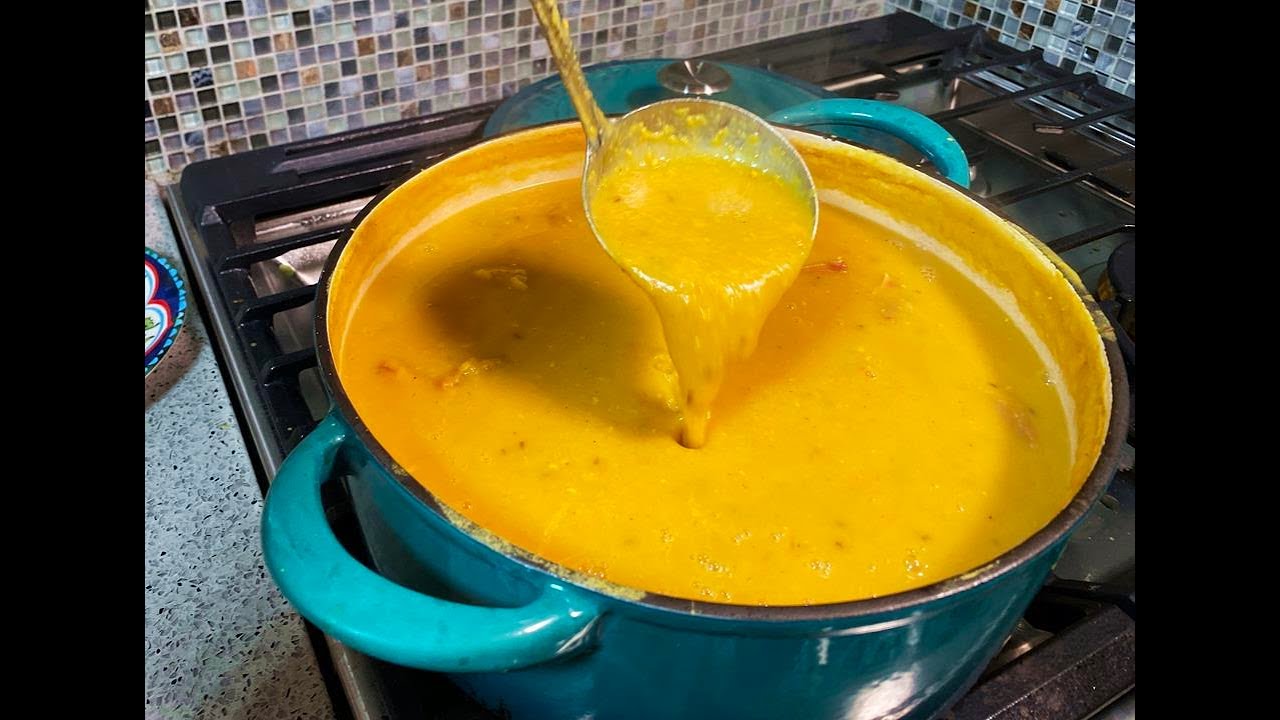
Taste and adjust the salt and make sure the gravy’s consistency is to your liking. Do remember it will further thicken as it cools, but should it be overly runny, crank up the heat for a few minutes to burn off some of that liquid.

While we prefer Roti as a side to the wonderful curry… served with steaming rice is also another tasty option. Or do like my eldest daughter and have fun treating it like a thick soup.. drizzled with peppersauce on the top and she’s in her little culinary delight world.

Beans and franks in a cast iron pan on a gas stove
Meat & Poultry

Beans And Franks.

Absolutely CORRECT… this is NOT a Caribbean Recipe. However it’s something I make during the hot summer months on my outdoor grill and/or when we go camping in the outdoors, as you can prep the ingredients in advance and take it with you to remote locations.

You’ll Need…

5-8 hot dogs (franks)
6-8 strips bacon
1 medium onion (chopped)
2 scallions (chopped)
2 cups bell peppers (assorted sweet peppers)
4-6 sprigs thyme (just the leaves)
1 can baked beans
1/2 teaspoon black pepper
salt (adjust accordingly)
1 tablespoon brown sugar (I used raw cane sugar)

Note! You can follow along with the video down below.

Start with a dry saucepan (I used a cast iron pan), with the bacon strips and turn your heat to medium (cold pan). The goal is to render out some of the fat of the bacon while getting them browned.

With my bacon browned and slightly crisp, I removed them onto a paper-towel lined plate to cool. Turn the heat down to med/low and add the chopped hot dogs to brown in the bacon fat. Should there be more that 2 tablespoon of fat, remove and discard the rest.

After the edges are brown, add the chopped onion (large pieces) and stir well.

Once the onion pieces are translucent (about 3-5 minutes), add the bell peppers, thyme, salt and black pepper and stir well. Cook for another 3-5 minutes to soften the bell peppers.

Now return the bacon back to the pan (rough chopped), followed by the baked beans and sir well. Heat still on medium-low. Toss in the brown sugar too. Be mindful that the bacon, hot dogs and baked beans will already have been salted, so you can skip adding any salt or adjust at the end.

After 3-5 minutes, add the chopped scallions to the pan, stir well, then shut off the stove.

Such a simple dish to make and enjoy with some toast at breakfast.

Recipe Card

Difficulty: Beginner Prep Time 5 mins Cook Time 15 mins Total Time 20 mins
Diet:

Description

A nostalgic one‑pot dish of baked beans, hot dogs, bacon, peppers, and thyme, ready in under 20 minutes.

Ingredients

Instructions

Video
  1. Place bacon in a cold pan, heat to medium, and cook until browned and fat is rendered. Remove bacon and set aside.

  2. Reduce heat to medium-low; add sliced franks to the bacon fat and brown. Remove any excess fat if over 2 tablespoons.

  3. Add chopped onion and cook until translucent (3–5 minutes), then stir in bell peppers, thyme, salt, and black pepper; cook until peppers soften (3–5 minutes).

  4. Return chopped bacon, add baked beans, and sprinkle brown sugar; stir gently to combine.

  5. Cook another 3–5 minutes, then add scallions, stir, and remove from heat.


  6. Serve hot on toast or in bowls for a one‑pot meal.

Tell us what you think
Gluten Free Meat & Poultry

Curry-Stew Chicken With Pigeon Peas And Potato.

Yet another classic recipe from my childhood days growing up on the islands. Curry-Stewed Chicken with Pigeon peas (which were freshly picked / shelled) and potato, which was usually made when mom didn’t have a lot of chicken and needed to feed everyone.

You’ll Need…

3 lbs Chicken thighs (skin and fat removed)
1 1/2 tablespoon Caribbean Green Seasoning
1 1/2 tablespoon curry powder
3/4 teaspoon salt
1/2 teaspoon black pepper
1 1/2 tablespoon olive oil
1 1/2 tablespoon golden brown sugar
1 medium onion (diced)
1 medium tomato (diced)
4 Wiri Wiri peppers
6 cloves garlic + 1 tablespoon grated ginger
4 medium potato (1/4s)
1 can Pigeon peas (about 1 1/2 cups – rinsed)
4 cups water
2 tablespoon chopped parsely

Note! Feel free to use any spicy pepper and in the amounts you can handle, especially if you cannot source the wiri wiri peppers. The spicy pepper is optional. Please watch the video below to follow along, especially when it comes to ‘browning’ the chicken which can be a bit tricky.

Season the chicken with the salt, black pepper, Caribbean Green Seasoning, tomato, onion and curry powder. Mix well and if you have time, allow it to marinate for a couple hours or over-night.

Heat a heavy deep pot on a high heat, add the oil followed by the brown sugar (watch the video below) and stir. The sugar will melt, go frothy and then a deep caramel color. At this point, add the seasoned chicken to the pot and stir well to coat. If the melted sugar goes black, STOP! Allow the pot to cool completely, wash, dry and start over, or you’ll end up with BITTER tasting chicken.

Turn the heat down to medium and cover the pot. It will come up to a boil and in doing so natural juices from the chicken will sprout. Cook for 4-5 minutes with the lid on.

You may peel your potatoes at this point and give the can of pigeon peas a rinse with cool water.

In the same bowl where you seasoned/marinated the chicken, swish around the 4 cups or water to pick up any remaining marinade in the bowl – set aside.

Remove the lid off the pot, turn up the heat and burn off the liquid. This will intensify the color and flavor of the curry-stew. Once the liquid is gone, add the potato, garlic, pigeon peas, wiri wiri peppers, grated ginger and water. Stir will.. scrape the bottom of the pot as well. Bring to a boil.

Depending on the size of the chicken thigh you use and how large the potato pieces are, it will take between 15 and 20 minutes to be cooked thoroughly. I cooked it with the lid on but slightly ajar and on a medium/low flame. Here is where you will decided on a few things. Taste and adjust the salt to your liking and continue cooking to thicken the gravy so it’s not too runny (unless you strangely enjoy thin gravy). In this case, I cooked it for a further 5 minutes with the lid off. I also used the back of the cooking spoon to crush some pieces of the potato to help thicken the gravy.

Do keep in mind that after you turn off the stove it will further thicken as it cools (residual heat from the pot). Toss in the chopped parsley and you’re done. A classic Caribbean dish (Trinidad and Tobago), usually served with roti or rice. You’ll notice that I posted this recipe under “Gluten Free”, but it’s important that you go through the full list of ingredients to make sure they meet with your specific Gluten Free dietary needs. (Read the label of the curry powder you use, some contain fillers).

Meat & Poultry

Outstanding Curry Chicken Hearts.

We’ve talked (well, just me) about how due to circumstance (slavery and indentureship) we’ve perfected the art of not only using entire animals, but using the parts many would toss in the rubbish and making TASTY meals out of it. Case in point – Curry Chicken Hearts.

You’ll Need…

1 lb chicken hearts (cut in half)
1 lime (or lemon or vinegar)
1/2 small onion (diced)
3 tablespoon olive oil
6-8 cloves garlic (smashed)
1 tablespoon Caribbean Green Seasoning
1 teaspoon cumin (geera) seeds
1 1/2 tablespoon curry powder
1 scotch bonnet pepper (sliced)
1/2 tablespoon salt
1/2 teaspoon black pepper
2 tablespoon water
2 tablespoon chopped Shado beni (culantro)

  • use cilantro if you cannot source culantro.

Cut each chicken heart in half, then wash with cool water and the juice of the lime. Rinse, drain and set aside.

Heat the oil in a saucepan on medium flame, then add the onion and garlic – turn the heat to low and cook for 2-3 minutes.

Add the Cumin (geera) seeds along with the black pepper and stir well. Then add the Caribbean Green Seasoning and cook for a further 3-4 minutes on that low flame.

It’s now time to add the curry powder (stir well) and let it cook for about 4 minutes. Toss in the scotch bonnet pepper (optional – if you like spicy).

Turn the heat up to med- high, toss in the cleaned chicken hearts and stir well. Add the salt and stir and cover the pot.

Add the water, turn the heat to med-low and with the lid on cook for 20 minutes. Watch the video below which may answer any additional questions you may have.

Taste and adjust the salt and see if they are as tender as you like. Now crank up the heat to burn off any remaining liquid and in the process, intensify the curry flavor.

Top with the chopped shado beni (culantro) or cilantro and enjoy. There are two ways I enjoy this dish. As a topping for sandwiches and as a side to rice and dhal.

Drop me your comments below, tag me on Instagram and don’t forget you can now get my cookbook – The Vibrant Caribbean Pot, 100 Traditional And Fusion Recipes @ CaribbeanPot.com/CookBook/

Gluten Free Meat & Poultry

Trini-Style Salted Beef Yellow Split Peas Dhal

Growing up in Trinidad, dhal was always bubbling on the stovetop, simple, nourishing, and perfect for soaking up with rice or roti. But when salted beef got tossed into the pot? Oh gosh, now yuh talking! The smoky, salty richness of the beef adds a whole new dimension to this classic yellow split pea dish. Whether it was a rainy Sunday lunch or a make-ahead meal for the week, this kind of dhal took comfort food to a next level. Here’s how to bring that authentic Trini flavor to your kitchen.

Big pot of saltbeef dhal

Ingredient Guide

  • Yellow Split Peas: These little dried peas cook down to a soft, creamy texture, perfect for dhal.
  • Salted Beef: Adds that unmistakable island umami; boil it first to mellow out the salt.
  • Turmeric: Brings a sunny color and gentle, earthy bitterness to the pot.
  • Garlic: Doubles up—some for the boil and some for the smoky tempering (chunkay).
  • Onion: Helps round out the flavor base with sweet-savory depth.
  • Scotch Bonnet Pepper: A little fire and fragrance, use whole or sliced depending on your heat tolerance.
  • Pimento Peppers: Optional but sweet and aromatic, a true Caribbean boost.
  • Cumin Seeds (Jeera): Slightly toasted in hot oil to add nutty goodness to the dhal.
  • Olive Oil: For frying the tempering spices until they sizzle.

Shopping Made Easy

  • Yellow Split Peas: You’ll find these in the dried beans aisle; grab a bag, as they last a long time.
  • Salted Beef: Check the Caribbean or international section, or ask your butcher for options of cured beef.
  • Turmeric: Ground turmeric is common, just look in the spice rack.
  • Scotch Bonnet & Pimento Peppers: Look for fresh ones in Caribbean groceries; substitute habanero or bell peppers if needed.
  • Cumin Seeds: Don’t mix up ground cumin with the seeds. Whole seeds are what you need for chunkay.

Cooking Notes from the Kitchen

  • Salted Beef Tip: Always pre-boil to tenderize and reduce the salty punch.
  • Dhal Texture: Swizzle it or blend it. Smooth is the way to go.
  • The Chunkay Technique: Roast garlic with cumin seeds to perfection for maximum flavor. Careful when adding to hot dhal—stand back, it will sizzle!
  • Batch Cooking Bonus: This dhal freezes like a dream. Perfect for busy weeknights.
  • Dhal Texture: Swizzle it or blend it—smooth is the way to go.
  • Big Batch Alert: This recipe yields a massive pot of dhal, as when I make it, I purposely cook a large batch to divide and freeze it for days when I get a dhal craving. When thawing, add 1/2 cup of water and place the mixture on very low heat. Divide the recipe to make smaller amounts.
  • Make It Gluten-Free: If you’re making this recipe gluten-free, be sure to review the full list of ingredients to ensure they meet your specific gluten-free dietary needs.

Can I make this dhal vegetarian?

Absolutely! Just skip the salted beef and go heavy on the garlic and cumin for depth. Still real tasty.

What can I serve with this dhal?

Traditionally, we enjoy it with rice or sada roti. But it’s also wicked with buss up shut or even just some crusty bread.

How do I store and reheat leftovers?

Cool it down, portion it out, and freeze for up to 3 months. Reheat gently on the stovetop with a splash of water.

Is there a substitute for Scotch bonnet peppers?

Habanero peppers come close. Or go mild with jalapeños, or leave it out if spice isn’t your thing.

Trini-Style Salted Beef Yellow Split Peas Dhal

Prep Time 15 mins Cook Time 2 hrs Total Time 2 hrs 15 mins
Diet:

Description

Hearty Trinidadian dhal enriched with salted beef, garlic, and cumin for a comforting, flavorful dish.

Ingredients

Instructions

Video
  1. Rinse the salted beef thoroughly. Place in a pot with water (not the 3 liters for dhal) and bring to a boil. Simmer for 1 to 1.5 hours to tenderize and remove excess salt. Drain, rinse, and set aside.

  2. In a large pot, bring 3 liters (12 2/3 cups) of water to a boil. Add the washed split peas and turmeric. Skim off any froth that rises to the top.

  3. In a large pot, bring 3 liters of water to a boil. Add the washed split peas and turmeric. Skim off any froth that rises to the top.

  4. Add the pre-cooked salted beef, black pepper, 3/4 of the garlic (smashed), diced onion, scotch bonnet, and pimento peppers. Simmer until peas are very soft and falling apart, about 1 to 1.5 hours. Stir every 15 minutes and add more water if needed.

  5. Remove the beef and set aside. Blend the dhal using a swizzle stick or stick blender until smooth.

  6. Stir in the salt, adjusting for taste. Return the beef to the pot, removing any bones and cutting it into pieces as necessary.

  7. Heat olive oil in a small pan. Add remaining smashed garlic and cumin seeds. Cook until the garlic is browned and the oil is aromatic. Carefully pour the dhal into the bowl and stir well.

  8. Keep in mind that the dhal will thicken as it cools. Once cooled you can divide into containers and freeze for later use.
  9. Let simmer a few more minutes to marry flavors. Remove from heat.

  10. Enjoy hot with rice, roti, or bread. Store leftovers in the freezer for up to 3 months.

Tell us what you think
Meat & Poultry

How To Make Salted Pigtails At Home.

Without a doubt, this is one of the most requested recipes from fans over the years. I guess with such a huge international audience tuned in to my work, its to be expected. Salted pigtails (like salted beef and salted fish like Cod and Pollock) is used in MANY of the traditional recipes of the Caribbean, so whenever I share a recipe including salted pigtails people are always stumped where to source it (outside the Caribbean). Luckily I’ve never had that problem as it’s easy to find in those huge white buckets at Asian and West Indian markets in Toronto and more lately, my city Hamilton.

You’ll Need

6-10 lbs raw pig tails
1 large bucket (make sure it can fit in your fridge)
water
6 cups Salt (pickling salt works best)

Note! Try to get a salt low in iodine, that’s course and does not clump easily. Yes you can add flavor ingredients to the salty brine (like bay leaves, spices, black peppercorns allspice berries etc), but this recipe is to show the simplicity in making the traditional version used in recipes in the Caribbean.

The raw pigtails can be sourced at many groceries or butcher shops. Should they not have it displayed, ask and I sure they will get some for you.

I start by scraping each piece with a knife to remove any debris and hairs, I then gave them each a good rinse with cool water.

Put about 9-10 cups of lukewarm water into the bucket you’re using and add the salt. The temp of the water will help to dissolve the salt. Whisk briskly until all the salts melts. Watch the video below for tips on how much salt you really need (adjustments).

Try to get a food grade bucket (new/clean) or a huge plastic container (ones you can find at most dollar stores). The key is to make sure it will fit the amount of pigtails you have and fit in your fridge at the same time. Luckily I have an overflow fridge downstairs.

It’s now time to add more chilled water, then (once the water in the brine is cool) pack in the pieces of pigtails into the bucket. Watch the video below to see how I added a plate to the top of the bucket before closing it, to help keep each piece of pigtail submerged in the salty brine.

Place in a cool dark spot (cellar) or in my case, the fridge for 3 weeks to a month. Then you’re good to start using salted pigtails in your next recipe. Make sure to keep the bucket in the fridge once you’ve started using it. It will keep in the salt for past 6 months. NOPE! I’ve never tried adding more raw pigtails to the same used brine… so I can’t comment on that question/concern.

Drop me your comments below, tag me on Instagram and don’t forget you can now get my cookbook – The Vibrant Caribbean Pot, 100 Traditional And Fusion Recipes @ CaribbeanPot.com/CookBook/