Fried rice and leftovers goes hand in hand. I can’t tell you the joy I feel in my soul when I see leftover rice in the fridge. This time around along with the rice, I remembered that there was ham in the freezer from last Thanksgiving. So I give you, my quick, easy and delicious Ham Fried Rice.
You’ll Need…
2-3 cups cooked rice (chilled) 2 scallions (chopped) 1 clove garlic (diced fine or crushed) 1/4 habanero pepper (optional – fine dice) 1 tablespoon light soy sauce 3/4 tablespoon oyster sauce 3/4 cup peas (I used frozen) 1 tablespoon vegetable oil 1 pimento pepper (seasoning pepper – diced fine) 1/2 carrot (1/2 cup diced) 1 cup diced ham
Time to prep the ingredients as this is a very quick recipe and we need everything handy.
Heat the oil on a medium/high heat in a wide pan (I used my wok, but you can use a frying pan or skillet if you like) then add the cubed ham (I had it thawed) and cook for 2-3 minutes. Since the pieces of ham was a bit fatty, I wanted to render down some of that fat to add additional flavor to the completed fried rice.
It’s now time to add the frozen peas followed by the pimento (use bell peppers if you can’t source Pimento peppers) and habanero pepper .. 30 seconds later add the garlic followed by the oyster sauce and stir well. Remember to wear gloves when handling such hot peppers as Habaneros and do wash your hands after with soap and water. Also remember that the seeds and white membrane around the seeds will be packed with raw heat.
May I recommend that you use chilled rice or at least day old rice as you will get a much more grainy texture to your finished dish. Add the rice, followed by the soy sauce and mix well.
Basically all you need to do is make sure the rice heats through (about 3-4 minutes). I did cook my rice with salt, so the sodium from the soy sauce is enough to season this perfectly for me. Adjust with added salt if you need to.
Turn off the stove and top with the scallions.. You’re done! This is why I LOVE fried rice. Quick, simple ingredients and an outstanding one-pot meal.
If you can, please support. And should you have questions about this recipe or anything food related, be sure to Ask Chris.
Two clarifications to make before we get to the recipe. 1. There’s ABSOLUTELY nothing “Caribbean” about this recipe. However I was challenged to share this Chicken Tikka Masala reccipe via Instagram and I also believe it would be something which would fit naturally within our diverse culinary landscape. And 2. …don’t spend too much time analyzing the bold title – I do stand behind the recipe 100% though (smile).
You’ll Need…
3-4 lbs chicken (boneless chicken thighs) 1 1/2 tablespoon veg oil 1 teaspoon crushed garlic 1 tablespoon grated ginger 3/4 tablespoon salt 1/4 teaspoon black pepper 3/4 cup plain yogurt 1 tablespoon garam masala 1 teaspoon cardamon (about 5 pods) 1 teaspoon coriander seeds (or powder) 1 teaspoon cumin seeds 1 tablespoon turmeric 1 tablespoon chili powder 2 tablespoon clarified butter (ghee) 1 large onion (diced) 2 medium tomatoes (diced finely – almost like a thick paste) 1 1/4 cup coconut milk 1 tablespoon honey 1-2 tablespoon cilantro (chopped finely)
It’s time to season and marinate the chicken pieces. First off I placed the coriander seeds, cumin and cardamon pods in my spice grinder and created a powder. Feel free to use powdered coriander, cumin and cardamon if you don’t have a spice grinder. A stone mortar and pestle will work as well.
Place the chicken in a large bowl and add the salt, black pepper, yogurt, coriander, cumin, cardamon, turmeric, chilli powder, garam masala, ginger and garlic. Then mix in the veg oil and marinate for 2 hours in the fridge.
It’s time to get started cooking. I’d recommend taking the marinated chicken out of the fridge about 15 minutes before we start here, as to get it up to room temperature. Add the clarified butter to a deep/wide pan over medium heat. Then add the pieces of seasoned chicken and cook/brown for about 10-13 minutes (flip). You may need to do this in two batches.
Set the chicken aside to cool a bit. There should still be fat in the pot (if not add more clarified butter). Adjust the heat to low, then add the diced onion (if you want to add more garlic and ginger here, you may). Add the tomato paste and diced tomato after 2 minutes.
Cook on the low heat for 2-3 minutes, then add the coconut milk. In most recipes you’ll see people use cream, but being from the Caribbean… you knew I’d rock the coconut milk. I almost forgot (IMPORTANT)add the coconut milk to the bowl you marinated the chicken in and swish it around to pick up any remaining spices etc. Then add to the pot. Raise the heat to bring to a gentle boil.
The chicken should be cool enough to handle now, cut into serving size pieces and get ready to add to the pot once it comes to a boil.
Stir well after adding the chicken to the pot, then reduce the heat to a simmer and cook for about 5-8 minutes. Basically until all the flavors and textures combines nicely and you get a consistency to the gravy you’re happy with. Due to the slight acidity from the tomatoes, I like adding a bit of honey (or brown sugar) at this point.
Taste for salt and adjust to your own liking, then top with the chopped cilantro. Do remember that the gravy will thicken more with the residual heat from the pot.
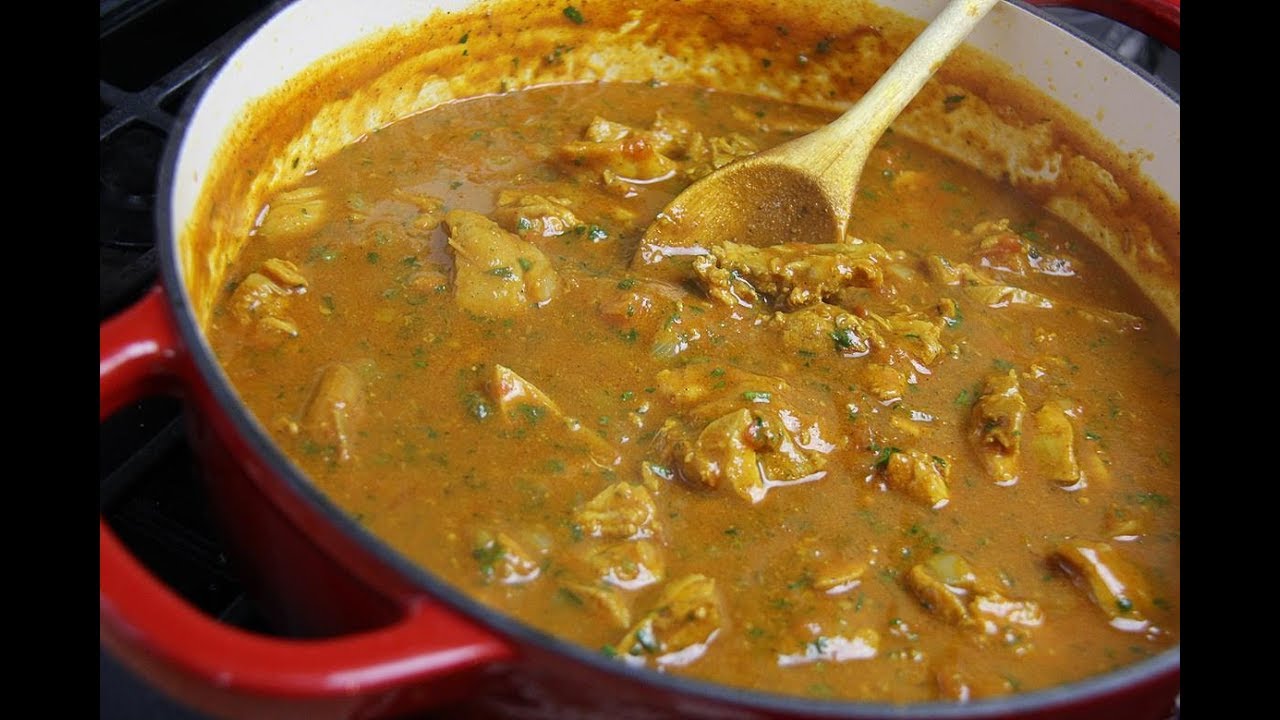
My take on the classic Chicken Tikka Masala. Succulent pieces of chicken, in a rich gravy.. just screaming for some hot roti! If you can, please support. And should you have questions about this recipe or anything food related, be sure to Ask Chris.
This dish features marinated chicken tikka pieces simmered in a creamy, spiced tomato-coconut sauce; rich, comforting, and infused with island-inspired flavor.
Ingredients
Instructions
Video
In a bowl, combine yogurt, ginger, garlic, garam masala, turmeric, cumin, coriander, chili powder, cardamom, salt, and pepper.
Add chicken pieces, toss to coat, and marinate for at least 2 hours or overnight.
Heat oil or ghee in a skillet over medium. Add diced onion and sauté 3–4 minutes until soft.
Add marinated chicken (reserve extra marinade), browning on all sides, about 5 minutes. Remove and set aside.
Add tomatoes and reserved marinade to the pan. Cook 5 minutes, stirring, until tomatoes begin to break down.
Return chicken to pan, stir in coconut milk and honey.
Bring to a gentle simmer, cover, and cook 15–20 minutes until chicken is cooked through and sauce thickens.
Taste and adjust seasoning. Stir in cilantro before serving.
Fried Chicken! There are as many ways to make this iconic dish as there are people who claim that their recipe is the greatest on the planet. While I won’t make such a bold statement, I will say this fried Chicken will rival and ‘better’ many of the recipes you’ve tried before. After-all my mommy taught me how to rock this one.
You’ll Need…
10-14 Chicken drumsticks 1 tablespoon Caribbean Green Seasoning 3/4 teaspoon salt 1/8 teaspoon black pepper 1/2 medium onion (grated) 1/2 teaspoon hot sauce (I used homemade Peppersauce) 1 teaspoon Curry Powder (madras blend) 1 1/2 tablespoon corn starch
To season the oil…
5-8 sprigs of thyme
2 scotch bonnet peppers
1 head of garlic (cut in half – skin on)
3-4 cups vegetable oil
TIP! Pre-heat the oil to 350ºF – While the chicken is frying, adjust the heat to maintain 325ºF in the oil.
It’s time to season and marinate your cleaned chicken drumsticks. In a large bowl or large zipper bag, add the chicken, Caribbean Green Seasoning, salt, black pepper, pepper-sauce, curry powder, corn starch (it will give the chicken a crispy finish) and grate in the onion. Mix well and set in the fridge to marinate for 2 hours (at least).
It’s time set up your frying station and heat the oil – heavy skillet and around med-high heat. Basically I have the seasoned and marinated chicken (room temperature now), the cast iron pan and a sheet pan with a wire rack and tongs.
You have 2 options here. As the oil heats, add the garlic, thyme and scotch bonnet peppers. Or as in my case, I added the first batch of chicken to the pan, then added the garlic, scotch bonnets and thyme. Do NOT over-crowd the pan with chicken pieces or the temperature of the oil will drop and you’ll get soggy/oily chicken. Do NOT over-fill the pan with oil – leave room for when you add the chicken pieces to fry. And DO NOT break the scotch bonnet peppers, or you will release the beast.
It will take between 15-20 minutes to cook the chicken (depending on the size of the drumsticks) all the way through and do remember that as the chicken cools it will go a bit darker in color. Set on to the wire rack to drain off any excess oil and if you want you can sprinkle on some additional salt while they’re still hot. Keep in mind that I’ve cut back on the amount of salt I use in my daily diet.
Such a simple yet delicious way to prepare fried chicken as we do in Caribbean. Try to not skip seasoning the oil as I did, this adds a wonderful flavor to the completed fried chicken.
Don’t forget to watch the video below. If you can, please support. And should you have questions about this recipe or anything food related, be sure to Ask Chris.
This dish brings back a ton of memories every-time I make it. I first shared this recipe back in 2018 on the YouTube channel and to this day it’s still a hit. As a young fella on the islands, Saturdays were reserved for attending Kung Fu movies at the local cinemas in San Fernando with my dad and younger brother. After-which dad would take us to a Chinese shop/restaurant on Mucurapo Street to have this same crispy pork belly – sandwiches. Loaded with pepeprsauce, ketchup and the odd time.. topped with chow mein. Real niceness!
You’ll Need…
3-4 lbs pork belly 2 tablespoon Chinese cooking wine 2 teaspoon sugar 1 teaspoon salt + 1 teaspoon for topping 1/2 teaspoon black pepper 1/2 teaspoon garlic powder 1/2 teaspoon onion powder 1 teaspoon 5 spice powder 2 tablespoon white vinegar
Important! Please try to get a piece of pork belly with a fair amount of lean meat and not too much fat. while you do need the fat, I find that too many times restaurants give us overly fatty crispy pork belly.
Make sure the pork is hair free (you may need to use a razor to remove any remaining hair on the skin). You now need to prick the skin of the pork so we get that crunch/crispy skin after it’s done in the oven. I used bamboo skewers to prick the skin (watch the video) but you can use anything with a sharp point – that can go through the skin (it can be tough). Try to prick as much of the skin as you can.
Then flip it over and make 1 inch (wide) cuts down the length of the flesh and about 1/2 inch deep (as in the pic below). here is where we’ll add the rub, so to add a ton of flavor to the completed dish.
First off, brush the Chinese cooking wine over the flesh side of the pork belly (not the skin) and into the cuts we made. Then make a mixture with the salt, black pepper, Chinese 5 Spice powder, sugar, garlic powder and onion powder and work into the flesh and cuts (NOT the skin).
Now flip it over and place in a bowl and into the fridge to air-dry overnight. Do NOT cover!
The next day, remove it from the fridge and let it come up to room temperature. Please pre-heat your oven to 400 F. Create a pouch with foil for the flesh side of the belly (see image below), with the skin exposed and brush the skin with the vinegar, then sprinkle on the remaining salt. Into the oven on the middle rack.
After 55 minutes, it’s time to crank up the heat in your oven to “broil” – which in my oven is 500 F.
Back on the middle rack – PLEASE keep an eye on things as this is where it can burn with the high heat. In my case the edges did char a bit, but small ting. It took about 7-10 minutes.
Allow it to cool, then flip it over and using the long cuts we originally made as a guide, slice though. then cut into bite size pieces.
A tribute to my childhood and spending time with my dad and brother. Do give the recipe a try as I know it will be a hit in your home. If you can, please support. And should you have questions about this recipe or anything food related, be sure to Ask Chris.
If you’re looking for a quick and delicious way to oven roast a chicken, I’v got such a recipe to share with you today. Mom would do something similar for us when we were kids on the islands, but heavier on the seasoning and she would cut the chicken into parts. Additionally, she never finished with the glaze as I’m about to show you.
Optional – grated ginger, pepper sauce (should you want it spicy) and sesame oil
IMPORTANT: If doing this recipe gluten free, please go through the entire list of ingredients to make sure they meet with your specific Gluten Free Dietary needs.
The first thing we’ve got to do is to spatchcock (remove the back bone) the chicken. Please watch the video below for the step by step process. Basically you can use kitchen shears or a sharp butcher’s knife to do so. Once the backbone is remove, use your hands to press-down on the breast of the chicken to flatten it. This will drastically reduce on the cooking time in the oven.
Preheat your oven to 375 F as we season the chicken.
In a small bowl, dilute the green seasoning with the olive oil. Then apply the salt and black pepper, along with the diluted green seasoning to both sides of the chicken.
I like using a wire rack in my baking tray as I like the hot air being able to surround the chicken. Cooks faster and more even. Plus it avoids me having to flip the chicken during roasting process. Be sure to line your baking tray with foil or parchment paper to avoid a mess to clean after.
Place the seasoned chicken into the oven, on the middle rack. Around the 50 minute mark we can remove the chicken and start with the simple glaze.
Mix the honey, mustard and lemon juice, then brush it onto the skin side of the chicken and back into the oven for 5-7 minutes. You should have enough glaze for a second round of brushing. As you take out the chicken after the first glaze, crank-up your heat to 425 F.
Since we increased the heat be mindful that the sugar in the honey can burn easily, so keep an eye on things. I left the chicken in for a further 5 minutes after the last glaze and the higher heat. Please note that at no time did I cover the chicken while it roasted.
Simple, yet DELICIOUS! Allow the chicken to rest for about 5 minutes before carving. Don’t forget to watch the video below. If you can, please support. And should you have questions about this recipe or anything food related, be sure to Ask Chris.
There’s a special place in my belly for jerk pork (no lie). While I much prefer it made over a coals fire so you get lovely smoked sort of finish, which really compliments the herbs and other ingredients in the classic Jamaican jerk marinade. The said… reality in Canada is it can get VERY cold during the winter months, so realistically I had to come up with a recipe with will duplicate those same flavors, but in an everyday kitchen oven. Here is such a recipe.
For dressing the roasting pan (optional)
+ thyme 5-8 sprigs
+ scallions 3
+ Orange juice 1 cup
Important!If doing this recipe gluten free, please go through the entire list of ingredients to make sure they meet with your specific gluten free dietary needs. Especially the soy sauce, which will have to be substituted for a gluten free type like Tamari.
Basically all you’re doing to start, is to create the marinade. Give all the ingredients a rough chop (where needed), then into a food processor or blender. You have 2 options A smooth marinade or a somewhat chunky one. I prefer chunky, so I pulsed the ingredients until it was at the texture and consistency I like.
The next step is to (well what I did). The piece of pork I used was from the leg or shoulder area (round piece of meat), so I butterfly it and made some deep cuts at the same time, to allow the marinade to really penetrate the meat and infuse this wonderful jerk favor from deep (watch the video below). Please try your best to use a fatty or marbled piece of pork. Not only will it be a cheaper cut, that fat will render and keep the meat really moist. Place the pork in a strong (big) zipper bag and pour the marinade over it.. massage and place in the fridge overnight for maximum flavor. Place the bag on a plate in case the bag leaks and if you remember, try to flip it a couple times during the marination process.
The next day.. pre-heat your oven to 375F and allow your pork to come up to room temperature (outside the fridge). Then place it in a heavy roasting pan and add the other ingredients mention in the list above. I pour the orange juice in the same bag we marinated the pork and moved it around to pick up any remaining marinade. Then onto the piece of pork in the roasting pan (I used a shallow side dutch oven).
Now into the 375 F oven on the middle rack. No I didn’t cover the roasting pan. After 30 minutes of so, I took it out of the oven and used the juices on the side to baste it a bit, then back into the oven. I believe I did this about 5-7 times during the roasting process.
It took about 3 hours in total to fully cook to my liking. At that point I took it out of the oven, tented it with some foil and allowed it to rest for about 15 minutes before slicing it up. Keep in mind that if you use a piece of pork with a bone running though the middle like I did.. be mindful when slicing. Also note that the scotch bonnet peppers will make this very spicy (don’t use the seeds if you want to tame it down a bit) and to wash your hands with soap and water immediately after handling such HOT peppers.
Save the pan drippings to pour over the sliced jerk pork, especially if you’ll be making sandwiches with the meat. That low and slow heat will certainly develop similar flavors to having made this over a coals fire.. so no big deal when it’s – 30 C outside during the winter months in Canada. Chris will still get his Jerk Pork fix!