/Gluten Free (Page 28)
Gluten Free Vegan

Curry Chataigne (breadnut / Katahar) The Best Vegan / Gluten Free Dish You’ll Ever Eat.

I’ve talked about it before! In the Caribbean we do #vegan naturally and what I mean by that is.. we don’t take 15 grains and try to make a burger. We would take those 15 grains (for example) and make several dishes out of them. This Chataigne (aka breadnut) is a delicious example of how we do vegetarian dishes naturally – just part of the commonplace culinary landscape. And to be honest, until the recent Vegan/Vegetarian movement, we didn’t even notice how many of our everyday dishes fall into the “category”.

You’ll Need…

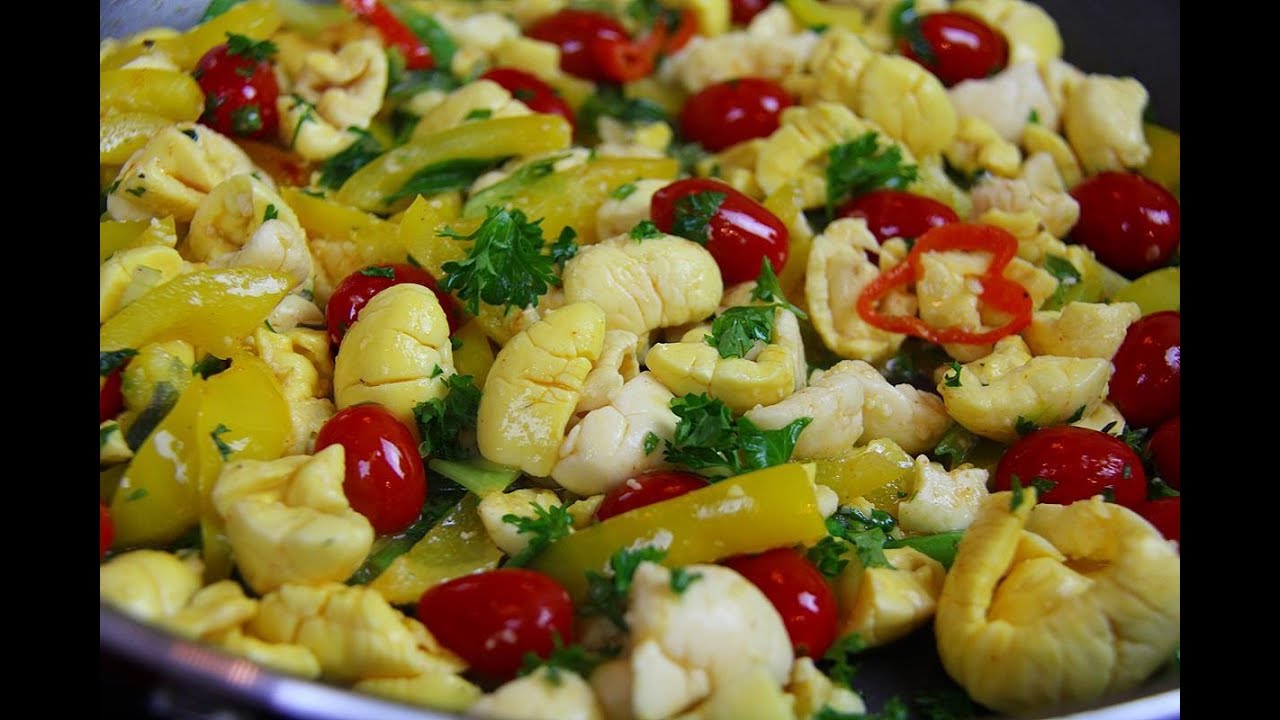
3 medium Chatagine (breadnut)
2 tablespoon vegetable oil
1 medium onion (sliced)
3 tablespoon curry powder
3/4 cup water to cook the curry
1 scotch bonnet (sliced)
5-8 cloves of garlic (divided)
1 tablespoon anchar masalla
1 1/2 tablespoon roasted geera / divided (cumin)
1 1/2 tablespoon Caribbean Green Seasoning
3/4 tablespoon salt (adjust)
3 cups coconut milk
3 pimento peppers (diced fine)

Important! If doing this recipe #glutenfree please go through the entire list of ingredients to make sure they meet with your specific gluten free dietary needs. Especially the curry powder as some may contain flour.

I’d recommend that you watch the video below featuring my mom and dad along with following with this recipe. As some elements may be better described there.

Rub your hands with coconut or vegetable oil (not mentioned in the ingredients list above). This will form a protective barrier so the natural sap off the Chatainge will not stain and discolor your hands. Using a sharp knife, peel the Chataigne, then cut into segments. Remove the core and discard. Then peel or shred off layers of the inside (very cabbage-like at this point). There will be seeds that you can include in the dish. If you choose to use the seeds (we used about 30%) you will need to remove the tough outer skin (discard) and slice the seeds in half.

Give everything a good wash in cool water and drain. Then heat the oil in a large heavy pot on a medium flame. It’s now time to add the onion and cook for 2-3 minutes.

Now add the curry powder cook 2 minutes to cook off any rawness (you’ll get this rawness at the end if you don’t cook it off now). Add 3/4 cup water, stir well. Go in with the scotch bonnet pepper and 3 cloves garlic grated… followed by 1/2 of the Geera and Anchar Masalla. Stir well, then add the Caribbean Green Seasoning and cook for 2-3 minutes. You will have a lovely thick slurry with a captivating aroma.

It’s now time to start adding the cleaned and prepared Chataigne along with any seeds you decide on using to the pot. As you do, please try to stir. It will seem like a lot at the start but it will wilt down. Do remember to add the salt at this point as well.

Cook for about 5 minutes, then add the coconut milk. My dad grated a couple dried coconuts from which my mom made freshly squeezed coconut milk (watch the video).

Bring to a boil, reduce to a simmer and cook gently with the lid on. 1/2 hr later, we topped it with the remaining garlic (whole cloves) and continued on that gentle simmer (lid on).

Be sure to stir the pot every 15 minutes or so. After 2 hours, add the minced Pimento peppers, mix in well and continue cooking. Yes it does take a while to cook until it’s tender and bursting with flavors. You’ll appreciate the time it takes to cook once you taste this Curry Chataigne.

Bearing in mind that it took 3 hours on that gentle simmer to cook, the last 10 minutes is when you’ll add the last of the roast Geera (ground cumin) and mix in well.

At the 3 hour mark you will have burned off all the liquid and the Chataigne will be tender and ready to enjoy with Sada or Buss-Up-Shut Roti. A CLASSIC Caribbean vegetable curry courtesy of my mom and dad. Much luv and thanks to them for sharing such a traditional recipe with us.

If you can, please support. And should you have questions about this recipe or anything food related, be sure to Ask Chris.

Gluten Free Vegetarian

Classic Caribbean 3 Peas Dhal (pea soup).

There’s something so comforting about a hot cup of Dhal on a cool (Caribbean people say COLD) rainy Caribbean evening (or cold wintry night in Canada).. when all you want is something to warm your soul like your moms voice! The very same appreciation we have for this humble Dhal, when accompanied with rice and a curry dish of some sort. COMFORTING!

You’ll Need…

1 cup green split peas
1 cup lentils
2 cups yellow split peas
8 cloves garlic (divided)
2 pimento peppers (sliced)
2 shallots (sliced)
10-12 cups water
1 tablespoon turmeric
1 teaspoon Geera seeds (cumin)
6 Wiri Wiri peppers (optional)
1 scallion (chopped)
3/4 tablespoon salt (adjust)
2-3 tablespoon olive oil

Important! If doing this recipe gluten free, please go through the entire list of ingredients to make sure they meet with your specific gluten free dietary needs. Additionally, I have this listed under the Vegan / Vegetarian category, but you will see curry chicken on the plate. Rest assured the 3 Peas Dhal itself is 100% vegan.

Go though the peas/lentils to make sure there’s no debris (sticks, pebbles etc) then wash and drain. In the meantime bring the water to a boil in a deep pot.

Pour the washed peas into the pot with the boiling water and bring back to a boil. Stir and let it go on a medium flame for 2- 3 minutes.

Skim off any froth/impurities at the top and discard. During this time you can prep the other ingredients.

With all the impurities skimmed off, add the salt, turmeric, 4 cloves garlic, shallots (add regular onion if you want), pimento peppers (optional as I know they will be hard to source), scallions and the WHOLE Wiri Wiri peppers. If you don’t have the Wiri Wiri (I’m lucky as I grow them in my garden)peppers , you can use an spicy pepper you have or like using. Or leave out the heat if you wish.

Bring to a boil, reduce to a simmer (no need to cover). 1 hr and 15 minutes later, you can taste for salt (adjust if necessary). I used my traditional wooden swizzle stick and worked it a bit to get it somewhat smooth texture (watch the video below). An electric stick blender will work, But pulse or risk it becoming frothy. IMPORTANT! Remove the Wiri Wiri peppers before you swizzle, whisk or blend the dhal. If they break you will release the heat. You can discard then or remove and place back after the swizzle action. Nice little prizes for the heat lovers you may enjoy a plate or cup of this dhal.

NO! We’re not done. It’s time for the final step where we add that lovely finishing note as our ancestors did. Add the olive oil (vegetable oil will work) to a small pan, add the remaining garlic and cumin seeds and on to the med/high heat. Get to smoking (give the garlic some color), then pour directly onto the soup. This action is called Chunkay. We’re basically tempering the dhal with the cumin, garlic flavor. Do NOT skip this step!

Should the garlic burn during this step, that’s ok. We kinda want that actually.

Note: I forgot to mention above. When it was time to swizzle the dhal, I turned off the stove. But make sure the peas are tender and falling apart first.

Goes well with rice and curry, as a soup on it’s own, add flour dumplings near the end for a dhal + dumpling soup and you can certainly freeze the rest. It usually lasts about 1-2 months in my freezer before I get the craving again or one of my daughters gets to it.

If you can, please support. And should you have questions about this recipe or anything food related, be sure to Ask Chris.

If you can, please support. And should you have questions about this recipe or anything food related, be sure to Ask Chris.

Gluten Free Vegetarian

Delightful Coconut Curry Seim.

This was my first time planting Seim in my Canadian garden so as you can imagine I was very excited to not only make an awesome dish with it, but also share it with you all. While I did share a curry Seim recipe back in 2010 (I think), you’ll find subtle differences with this one.

You’ll Need…

1 1/2 lbs Seim beans
1/2 medium onion (diced)
1/4 habanero pepper (sliced thin)
1 1/2 tablespoon Curry Powder
2 tablespoon veg oil
3/4 teaspoon salt
1/4 teaspoon black pepper
2 large cloves garlic (sliced or crushed)
1 pimento pepper (aka seasoning pepper)
1 teaspoon Caribbean Green seasoning
2 tablespoon coconut cream
3/4 cup water
4 medium potatoes (cut into pieces)

Important! If doing this recipe gluten free make sure you go though the entire list of ingredients to make sure they meet with your specific gluten free dietary needs. Especially the curry powder you use, as some can contain flour as a filler in some cases.

We’ve got to prep the Seim. Wash and drain them, then remove the outer rib with a pairing knife (watch the video below). After-which, cut each Seim into 1/2 (or smaller if you wish). Prep the other ingredients.

Heat the oil (you may also use coconut oil if you prefer) on a low heat, in a wide and somewhat deep pan. Then add the garlic and cook for about 30 seconds, then add the curry powder – stir! Maintain a low heat to bloom the spices which makes up the curry powder – it will go darker and clump. Cook for 3-4 minutes to cook off the rawness of the curry.

It’s now time to turn up the heat to med/high and add the prepped Seim. Stir well. We want to degalze the bottom of the pot and pick up all that curry goodness.

Now add the onion, habanero (any hot pepper you like), pimento pepper (optional as they’re almost impossible to find outside the southern Caribbean), black pepper, salt, Caribbean Green seasoning and coconut cream (use less water if using coconut milk – 1/2 cup coconut milk if that’s the case). Then go in with the water and stir well.

Add the potato pieces and bring to a boil. Then reduce the heat to a simmer, place the lid on and let it cook until tender and the water is burned off.

25 minutes later you will have everything tender, moisture gone and your kitchen will have the lovely aroma of a good vegan curry. Add the chopped tomato, stir and take off the heat. You’re done. Allow the residual heat to finish cooking the tomato.

Remember to taste for salt and don’t forget the golden rule – wash your hands with soap and water immediately after handling such hot peppers as Habanero. A tasty vegetarian curry that’s very unique in flavor from the Seim and it goes well with HOT Sada or Buss Up Shut roti.

If you can, please support. And should you have questions about this recipe or anything food related, be sure to Ask Chris.

vegan ackee and saltfish
Gluten Free Vegan

Tasty Vegan Ackee And Saltfish.

Confused yet? I know the title says Vegan, but Saltfish! The simple explanation is… the classic dish is called Ackee and Saltfish in Jamaica, so I felt it was the easiest way to pay tribute to this national dish, while still keeping it vegan (and gluten free) friendly. Make sense yet?

You’ll Need…

1 can Ackee (washed/drained)
1.5 tablespoon coconut oil
1 bell pepper (sliced in thick strips)
1/2 scotch bonnet pepper (sliced thin)
3 cloves garlic (diced fine or crushed)
3 scallions (chopped)
4 sprigs thyme (leaves)
2 tablespoon parsley (chopped)
1 cup cherry or grape tomatoes (any tomato will work)
1/2 teaspoon hot smoked paprika
1/4 teaspoon salt
1/4 teaspoon black pepper

Important! If making this recipe gluten free be sure to go through the entire list of ingredients to make sure they meet with your specific gluten free dietary needs.

Since I live in Canada I have no choice but to use the ackee found in a can. This canned ackee is pre-cooked and in a salty brine solution. Drain the brine, rinse with cool water and set aside to air dry as we prep the other ingredients.

Heat the coconut oil in a wide pan on a low heat then add the scallions and bell pepper. Stir well then add the garlic, black pepper and scotch bonnet pepper. Remember to wear gloves and wash your hands with soap and water after handling the scotch bonnet pepper (and don’t include any seeds nor the white membrane around the seeds, unless you want the raw heat) .

Cook on the low heat for two minutes then add smoked paprika, tomato (I cut the grape tomatoes in 1/2) and parsley. I find that the slight smoky heat from the paprika reminds us of the Salted Cod which is traditionally used in this recipe in Jamaica. Cook a further 2 minutes.

For even more flavor, it’s time to go in with the thyme leaves and the salt. Your heat is still on low – cook another 2 minutes. Then gently add the Ackee to the pan. Be VERY Gentle please. Stir well to mix all the flavors.

Since the Ackee will be precooked, all you have to do is make sure it heats though and you’re done (about 3-4 minutes).

Taste for salt and adjust if necessary, then get ready to enjoy a lovely vegetarian version of Classic Jamaican Ackee and Saltfish.

If you can, please support. And should you have questions about this recipe or anything food related, be sure to Ask Chris.

Recipe Card

Difficulty: Beginner Prep Time 20 mins Cook Time 20 mins Total Time 40 mins

Description

A plant-based take on the iconic Jamaican dish, blending creamy ackee with flaky hearts of palm in a savory, spicy sauté.

Ingredients

Instructions

Video
  1. Heat coconut oil in a large skillet over medium heat. Sauté garlic, onion, and bell pepper until softened, about 5 minutes.
  2. Add tomatoes, scotch bonnet, and thyme leaves, and cook another 3 minutes.
  3. Gently stir in ackee and hearts of palm. Cook for 5–7 minutes until warm and blended.
  4. Season with salt, pepper, and optional kelp flakes.
  5. Stir in scallions, cook 1 minute more, then remove from heat. Serve hot.
Tell us what you think
Garlic herbed mushrooms in a red pot with a wooden spoon
Gluten Free Vegetarian

Garlic Herb Mushrooms.

I guess I should start off with the customary Nothing About The Recipe Is Caribbean! That said, this Garlicky Herb Mushrooms was one the most requested recipes last year, after I posted a pic on Instagram. It was only natural that it was part of my #MeatFreeMondays series on YouTube.

You’ll Need…

1 lb button mushrooms (cleaned)
2 tablespoon olive oil
1 1/2 tablespoon butter
1 medium onion (diced)
3-5 cloves garlic (crushed – depends on how much you like garlic)
3-4 sprigs thyme
1 tablespoon parsley (chopped)
1/4 teaspoon salt
3-4 tablespoon white wine
1/4 teaspoon black pepper
1/4 teaspoon pepper flakes

Important: If doing this recipe gluten free, please go through the entire list of ingredients to make sure they meet with your specific gluten free dietary needs.

Cleaning Mushrooms – You’ll see TV chefs and food personalities recommend using a brush to brush off any dirt off the mushrooms and to never wash them. NOPE! Not for me. I wash and air/paper-towel dry my mushrooms. I know too well the kind of dirt they grow in. Just my personal choice.

In a wide pan on a medium heat, melt the butter in the oil, then add the onions. Immediately turn the heat down to low and cook gently for 3 minutes.

After-which, turn the heat back up to medium high and add the mushrooms. Stir well to coat with the onion flavored oil/butter combo.

BTW, the bigger mushrooms I cut in half. The reason why I recommend a wide pan above, is so each mushroom can touch the surface of the pan. We’ll get a lovely color and caramelization.

After about 7-9 minutes, you should see the mushrooms shrink in size and develop some color. The bottom of your pan will have brown spots (that’s FLAVOR).

It’s now time to get that ‘flavor’ working for us. Pour in the wine to degalze the bottom of the pot (use apple juice or veg stock if you want). Cook for a minute, then add the pepper flakes, parsley, thyme, salt, black pepper and garlic. Stir well to get all that garlic and herb niceness all over the mushrooms. Turn the heat back down to low as we don’t want to burn the garlic and herbs.

Cook for a further 2-3 minutes.. basically until the garlic warms through and perfumes the dish.

Definitely not a “Caribbean” dish, but mushroom lovers will be thank you for making this one. I guarantee you this Garlic Herb Mushrooms will be a regular on your menu and you will get requests for it.

If you can, please support. And should you have questions about this recipe or anything food related, be sure to Ask Chris.

Gluten Free Vegetarian

Traditional Caribbean Fry Carilie (bitter melon).

I’ve said it before and I’ll keep saying it, Carilie or Bitter-melon and I (Chris) can NEVER be friends. From day one as a young fella on the islands to my grown self – mom could never get me (nor my siblings) to eat this. Maybe the ONLY way I’ve ever enjoyed Carile is when I had it (pickled) in a salad at Cafe Mariposa in Lopinot, Trinidad last year during Restaurant Week TT. While this dish is delicious (according to my dad), Carilie in any form is an acquired taste yea.

You’ll Need…

3 large Carilie (bitter melon)
3 large cloves garlic (diced fine)
1 1/2 tablespoon salt (for removing the bitterness)
1/4 teaspoon salt for cooking (if needed)
2 pimentio pepper (sliced thin)
4 wiri wiri (leave whole)
1 1/2 tablespoon curry powder
2 tablespoon olive oil
3/4 teaspoon ground cumin (roasted)
3/4 teaspoon amchar masalla
1 medium onion (sliced thin)

Important! If making this dish gluten free, please go through the entire list of ingredients to make sure they meet with your specific gluten free dietary needs. Especially the curry powder you use, as some are known to contain flour.

The goal with this step is to try and remove some of the bitter base of the Carilie. Or you can skip this step if you enjoy the harsh bitterness. Wash, core and slice the Carilie (watch the video below to see how I did this).

Then mix in the 1 1/2 tablespoon of salt (mix well) with the sliced Carilie and set aside for 20 minutes. This step will remove some of the moisture from the slices and in doing so, the bitterness as well.

Then squeeze the slices after the 20 mins, rinse with cool water and squeeze a second time. Lets get ready to cook at this point.

Heat the olive oil in a heavy pan on a medium heat, then go in with the garlic. Immediately turn down the heat to as low as it can go and cook for 2-3 minutes. After-which, turn up the heat to med/high and add the prepared Carilie. Stir well to coat with the garlic flavored oil.

After 2-3 minutes, mix in the cumin, amchar maslla and curry powder. Stir. Then top with the sliced onion, pimento pepper and Wiri Wiri peppers (any hot pepper will work – if you like heat). Stir. Don’t break the peppers while cooking unless you want the raw heat.

Cook with the lid on for about 15 minutes on a low heat. Remember to stir it a couple times or it may want to stick/burn. Now remove the lid, crank the heat to medium and cook off any moisture and to deepen the color.

To this day my dad (and mom) insist that I’m missing out on an extremely delicious dish.. I have tried several times in my adult life to eat this. Even with my moms recipe, where she includes salted cod in it. NOPE.. nice try mom and dad. NOT FOR ME THANKS!

If you can, please support. And should you have questions about this recipe or anything food related, be sure to Ask Chris.