/Gluten Free (Page 15)
Gluten Free Meat & Poultry

Curry-Stew Chicken With Pigeon Peas And Potato.

Yet another classic recipe from my childhood days growing up on the islands. Curry-Stewed Chicken with Pigeon peas (which were freshly picked / shelled) and potato, which was usually made when mom didn’t have a lot of chicken and needed to feed everyone.

You’ll Need…

3 lbs Chicken thighs (skin and fat removed)
1 1/2 tablespoon Caribbean Green Seasoning
1 1/2 tablespoon curry powder
3/4 teaspoon salt
1/2 teaspoon black pepper
1 1/2 tablespoon olive oil
1 1/2 tablespoon golden brown sugar
1 medium onion (diced)
1 medium tomato (diced)
4 Wiri Wiri peppers
6 cloves garlic + 1 tablespoon grated ginger
4 medium potato (1/4s)
1 can Pigeon peas (about 1 1/2 cups – rinsed)
4 cups water
2 tablespoon chopped parsely

Note! Feel free to use any spicy pepper and in the amounts you can handle, especially if you cannot source the wiri wiri peppers. The spicy pepper is optional. Please watch the video below to follow along, especially when it comes to ‘browning’ the chicken which can be a bit tricky.

Season the chicken with the salt, black pepper, Caribbean Green Seasoning, tomato, onion and curry powder. Mix well and if you have time, allow it to marinate for a couple hours or over-night.

Heat a heavy deep pot on a high heat, add the oil followed by the brown sugar (watch the video below) and stir. The sugar will melt, go frothy and then a deep caramel color. At this point, add the seasoned chicken to the pot and stir well to coat. If the melted sugar goes black, STOP! Allow the pot to cool completely, wash, dry and start over, or you’ll end up with BITTER tasting chicken.

Turn the heat down to medium and cover the pot. It will come up to a boil and in doing so natural juices from the chicken will sprout. Cook for 4-5 minutes with the lid on.

You may peel your potatoes at this point and give the can of pigeon peas a rinse with cool water.

In the same bowl where you seasoned/marinated the chicken, swish around the 4 cups or water to pick up any remaining marinade in the bowl – set aside.

Remove the lid off the pot, turn up the heat and burn off the liquid. This will intensify the color and flavor of the curry-stew. Once the liquid is gone, add the potato, garlic, pigeon peas, wiri wiri peppers, grated ginger and water. Stir will.. scrape the bottom of the pot as well. Bring to a boil.

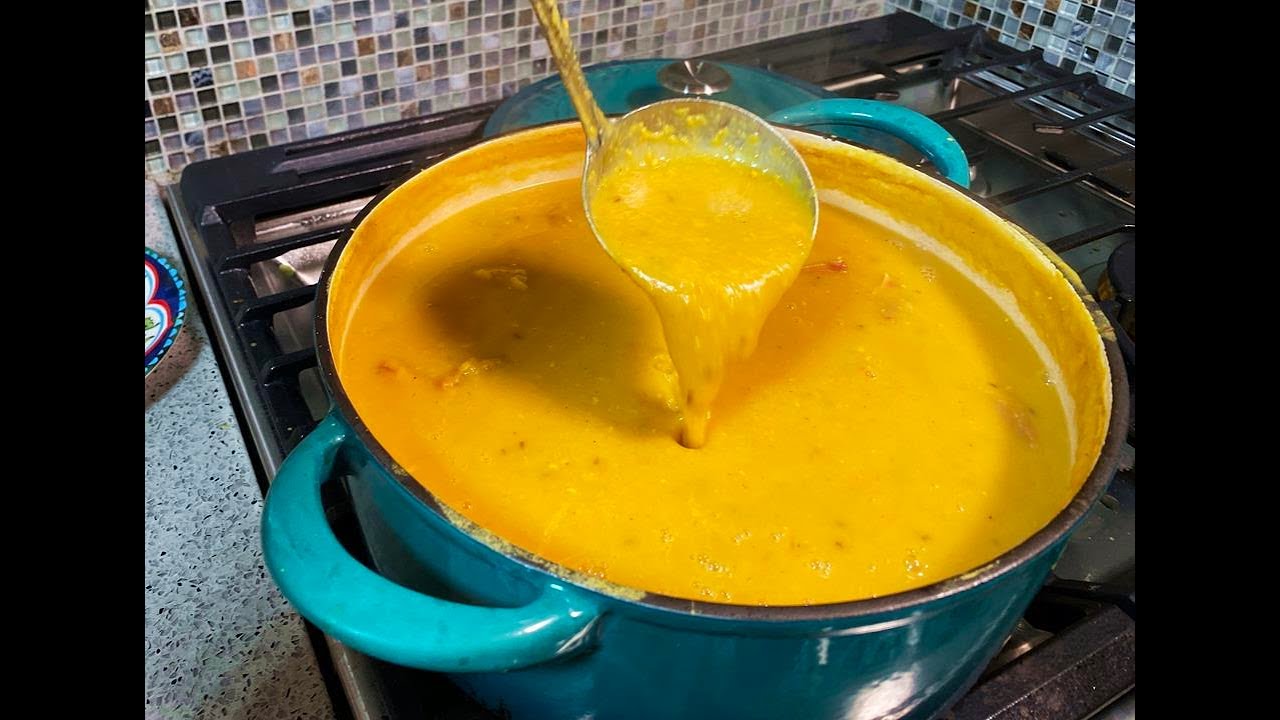
Depending on the size of the chicken thigh you use and how large the potato pieces are, it will take between 15 and 20 minutes to be cooked thoroughly. I cooked it with the lid on but slightly ajar and on a medium/low flame. Here is where you will decided on a few things. Taste and adjust the salt to your liking and continue cooking to thicken the gravy so it’s not too runny (unless you strangely enjoy thin gravy). In this case, I cooked it for a further 5 minutes with the lid off. I also used the back of the cooking spoon to crush some pieces of the potato to help thicken the gravy.

Do keep in mind that after you turn off the stove it will further thicken as it cools (residual heat from the pot). Toss in the chopped parsley and you’re done. A classic Caribbean dish (Trinidad and Tobago), usually served with roti or rice. You’ll notice that I posted this recipe under “Gluten Free”, but it’s important that you go through the full list of ingredients to make sure they meet with your specific Gluten Free dietary needs. (Read the label of the curry powder you use, some contain fillers).

Gluten Free Sauces & Condiments Vegetarian

Big Bad Summer Salsa.

This recipe takes me back to Dorado on the north coast of Puerto Rico. I recall it being scorching hot (when you leave the winter month of February in Canada the sun seems more intense), and a bucket of Corona (5) at the bar was $20 and, like all Caribbean watering holes, the music was PUMPING from their sound system! A basic salsa was served with tostones (plantain) and while that salsa could never match the one I’m about to share, but for some reason it tasted grand.

You’ll Need…

8-10 tomatoes (I used Roma)
1/2 medium onion (diced)
5 garlic scapes (optional)
2 Thai peppers (spicy)
1/2 teaspoon black pepper
1 lime (juice)
1 teaspoon sea salt (divided)
1 avocado (diced)
1 tablespoon chopped shado beni (or cilantro)
2 cloves garlic (smashed)
2 tablespoon olive oil (divided)

Notes. I grilled 1/2 of the tomato and left the others raw. It was the same for the 2 spicy (any spicy pepper you like) peppers, I grilled one and kept one raw (explained why in the video below). IMPORTANT! If you’re making this recipe as part of your gluten free diet, please go through the full list of ingredients to make sure they meet with your specific gluten free dietary needs.

Drizzle 1 tablespoon of olive oil over the Garlic Scapes, 1 of the spicy peppers and 4 of the tomatoes, then place them on a hot grill. Should you not have a grill, you may use your oven (450 F). Basically you’re trying to charr everything, but in the case of the tomato (which will take much longer to cook), you want to actually roast (about 8-10 minutes) them.

Let’s go back inside now and finish things off. In your mortar, place the salt, grilled pepper and garlic. crush until you have a somewhat smooth paste.

By this time the tomatoes should be cool enough for you to remove the skin. Place them in the mortar and crush them with the paste we made. Try to allow the tomato to retain some texture.

Give the garlic scapes and grilled pepper a fine chop. Then remove the stem/core (discard) from the raw tomatoes we didn’t grill, and dice those as well. The goal is to have a grilled and raw component to the salsa, for texture and flavor.

Add everything to a mixing bowl, including the diced onion and black pepper. At this time you may add your diced avocado, along with the juice of a lime.

While in most cases you’ll top this with chopped cilantro, I opted (I had in my garden) for Chadon Beni (culantro) and the remaining tablespoon of olive oil.

Taste and adjust the salt to your liking and BOOM… you’ve got a kick-ass summer salsa, based on my memories of being in Puerto Rico.

What are garlic scapes, exactly? These green stalks extend from the base of hardneck garlic plants, resembling oversize chives or scallions. They’re related to but different from green garlic (the bulbs and shoots of garlic plants that haven’t fully matured)

Gluten Free Seafood

Fry Pak Choi With Saltfish.

Pak Choi (Pak Choy or Bok Choy) as I recall, mom usually cooked when she had leftover Stewed Pork from the previous evening’s dinner to add to the mix. Rarely did she ever make it on it’s own or with salted cod (say saltfish) as I’m about to share with you.

You’ll Need…

5 lbs Pak Choi
1/2 teaspoon salt
1/2 teaspoon black pepper
1/2 scotch bonnet pepper (optional)
1/4 lb prepared salted Pollock
8-10 grape tomato
1/2 large onion (sliced)
7 cloves garlic (smashed)
2 tablespoon olive oil

Notes. The Salted Cod (salted Cod will work, but it can be a bit more expensive) I used was packaged as ‘boned’, which means the bones were removed. Watch this video on How To Prepare Salted Fish for use. I used chopped grape tomatoes, but you can dice a whole large tomato should you not have any. If you’d like to keep this fully vegan, you can skip the salted fish step. IMPORTANT! If doing this recipe gluten free, please go through the full list of ingredients to ensure they meet with your gluten free dietary needs.

It’s very important that you remove all the leaves of the Pak Choi and wash them individually (explained why in the video below). Then trim off the bottom (discard), stack and chop.

Prep your other ingredients as well.

In a wide saucepan on a medium low flame, add the olive oil (use any oil you like using) followed by the salted fish pieces. Stir and cook for 2-3 minutes.

Then add the onion, garlic, scotch bonnet pepper (if you like things spicy) and black pepper. Cook for a further 3 minutes.

It’s now time to start adding the washed and chopped Pak Choi to the pot. It will seem like a lot, but in a few minutes it will wilt down and easily fit in the sauce pan. I try to not cover the pan as I find it develops too much moisture (apart from the moisture the pak choi will already release).

Keep adding the chopped pak choi as it wilts down, then add the salt. Note. The salted Pollock may still have a bit of salt left in it even after you prepare it, so please keep that in mind. Reduce your heat to medium low and cook for about 25 minutes.

At this point, add the tomato to the pot and stir well. It’s now time to personalize this dish a bit. Taste and adjust the salt to your liking and in my case it still had a tiny bit of moisture on the bottom of the pan, so I cranked up the heat for 5 minutes, to get rid of that (fry it dong, as my mom say). However it’s up to you if you want that moisture as it’s fully cooked at this point.

This day I enjoyed it with rice, but my favorite is with Sada Roti fresh off the tawa.

Drop me your comments below, tag me on Instagram and don’t forget you can now get my cookbook – The Vibrant Caribbean Pot, 100 Traditional And Fusion Recipes @ CaribbeanPot.com/CookBook/

Gluten Free Meat & Poultry

Trini-Style Salted Beef Yellow Split Peas Dhal

Growing up in Trinidad, dhal was always bubbling on the stovetop, simple, nourishing, and perfect for soaking up with rice or roti. But when salted beef got tossed into the pot? Oh gosh, now yuh talking! The smoky, salty richness of the beef adds a whole new dimension to this classic yellow split pea dish. Whether it was a rainy Sunday lunch or a make-ahead meal for the week, this kind of dhal took comfort food to a next level. Here’s how to bring that authentic Trini flavor to your kitchen.

Big pot of saltbeef dhal

Ingredient Guide

  • Yellow Split Peas: These little dried peas cook down to a soft, creamy texture, perfect for dhal.
  • Salted Beef: Adds that unmistakable island umami; boil it first to mellow out the salt.
  • Turmeric: Brings a sunny color and gentle, earthy bitterness to the pot.
  • Garlic: Doubles up—some for the boil and some for the smoky tempering (chunkay).
  • Onion: Helps round out the flavor base with sweet-savory depth.
  • Scotch Bonnet Pepper: A little fire and fragrance, use whole or sliced depending on your heat tolerance.
  • Pimento Peppers: Optional but sweet and aromatic, a true Caribbean boost.
  • Cumin Seeds (Jeera): Slightly toasted in hot oil to add nutty goodness to the dhal.
  • Olive Oil: For frying the tempering spices until they sizzle.

Shopping Made Easy

  • Yellow Split Peas: You’ll find these in the dried beans aisle; grab a bag, as they last a long time.
  • Salted Beef: Check the Caribbean or international section, or ask your butcher for options of cured beef.
  • Turmeric: Ground turmeric is common, just look in the spice rack.
  • Scotch Bonnet & Pimento Peppers: Look for fresh ones in Caribbean groceries; substitute habanero or bell peppers if needed.
  • Cumin Seeds: Don’t mix up ground cumin with the seeds. Whole seeds are what you need for chunkay.

Cooking Notes from the Kitchen

  • Salted Beef Tip: Always pre-boil to tenderize and reduce the salty punch.
  • Dhal Texture: Swizzle it or blend it. Smooth is the way to go.
  • The Chunkay Technique: Roast garlic with cumin seeds to perfection for maximum flavor. Careful when adding to hot dhal—stand back, it will sizzle!
  • Batch Cooking Bonus: This dhal freezes like a dream. Perfect for busy weeknights.
  • Dhal Texture: Swizzle it or blend it—smooth is the way to go.
  • Big Batch Alert: This recipe yields a massive pot of dhal, as when I make it, I purposely cook a large batch to divide and freeze it for days when I get a dhal craving. When thawing, add 1/2 cup of water and place the mixture on very low heat. Divide the recipe to make smaller amounts.
  • Make It Gluten-Free: If you’re making this recipe gluten-free, be sure to review the full list of ingredients to ensure they meet your specific gluten-free dietary needs.

Can I make this dhal vegetarian?

Absolutely! Just skip the salted beef and go heavy on the garlic and cumin for depth. Still real tasty.

What can I serve with this dhal?

Traditionally, we enjoy it with rice or sada roti. But it’s also wicked with buss up shut or even just some crusty bread.

How do I store and reheat leftovers?

Cool it down, portion it out, and freeze for up to 3 months. Reheat gently on the stovetop with a splash of water.

Is there a substitute for Scotch bonnet peppers?

Habanero peppers come close. Or go mild with jalapeños, or leave it out if spice isn’t your thing.

Trini-Style Salted Beef Yellow Split Peas Dhal

Prep Time 15 mins Cook Time 2 hrs Total Time 2 hrs 15 mins
Diet:

Description

Hearty Trinidadian dhal enriched with salted beef, garlic, and cumin for a comforting, flavorful dish.

Ingredients

Instructions

Video
  1. Rinse the salted beef thoroughly. Place in a pot with water (not the 3 liters for dhal) and bring to a boil. Simmer for 1 to 1.5 hours to tenderize and remove excess salt. Drain, rinse, and set aside.

  2. In a large pot, bring 3 liters (12 2/3 cups) of water to a boil. Add the washed split peas and turmeric. Skim off any froth that rises to the top.

  3. In a large pot, bring 3 liters of water to a boil. Add the washed split peas and turmeric. Skim off any froth that rises to the top.

  4. Add the pre-cooked salted beef, black pepper, 3/4 of the garlic (smashed), diced onion, scotch bonnet, and pimento peppers. Simmer until peas are very soft and falling apart, about 1 to 1.5 hours. Stir every 15 minutes and add more water if needed.

  5. Remove the beef and set aside. Blend the dhal using a swizzle stick or stick blender until smooth.

  6. Stir in the salt, adjusting for taste. Return the beef to the pot, removing any bones and cutting it into pieces as necessary.

  7. Heat olive oil in a small pan. Add remaining smashed garlic and cumin seeds. Cook until the garlic is browned and the oil is aromatic. Carefully pour the dhal into the bowl and stir well.

  8. Keep in mind that the dhal will thicken as it cools. Once cooled you can divide into containers and freeze for later use.
  9. Let simmer a few more minutes to marry flavors. Remove from heat.

  10. Enjoy hot with rice, roti, or bread. Store leftovers in the freezer for up to 3 months.

Tell us what you think
Gluten Free Seafood

Incredible Saltfish Buljol (budget friendly).

While I did share a similar saltfish buljol recipe back in 2009, you’ll find subtle differences with this version, especially the price difference in using salted Pollock vs the Salted Cod I used in that version. With the current state of inflation and high prices in the supermarket, I trust you’ll appreciate this cheaper version of Saltfish Buljol. We’re NOT sacrificing flavors!

You’ll Need…

1 lb salted Pollock (salted Cod is traditionally used)
1 tomato (diced)
1 medium onion (sliced thin)
3 scallions (chopped)
2 cloves garlic (crushed)
1/2 lime (juice)
1/2 medium carrot (grated)
1 scotch bonnet pepper (sliced thin)
3/4 teaspoon black pepper
3 tablespoon olive oil
4 sprigs thyme (leaves only)

Important! I used an entire scotch bonnet pepper in this recipe, but you can cut back (or add more) to meet with your tolerance for heat. If doing this recipe gluten free, please go though all of the ingredients to make sure they meet with your specific gluten free dietary needs.

Unlike Salted Cod which needs to be soaked in cold water or boiled to remove the salt and rehydrate the fish, I find that all one needs to do with Pollock is to pour hot water from your kettle over it in a large bowl, allow it to soak until the water cools. Then all you’ll do next is drain, rinse with cool water and flake or shred as needed.

Please note that you can always refer to the video below if I didn’t explain anything fully or you’d like to tune in for my banter and tips.

The texture of the shredded salted fish is one of those things you can personalize to your own liking. In the past I’ve also put the saltfish into a food processor and got it really fine. As the Pollock soaked in the hot water I prepped the other ingredients, so it’s now time to assemble.

Place the prepped salted pollock into a large bowl (try to squeeze dry after rinsing), followed by everything except the oil and lime juice.

Before I forget… I used BONED (boneless) salted Pollock, but I still kept an eye out for any tiny bones as I shredded it.

Give it a good mix, then place a frying pan on a med/high heat and heat the oil until you start seeing smoke. Now pour this hot oil over everything and give it a good mix. The hot oil (this method is called chunkay) and it allows us to waken up the flavors of everything and also act as a means of helping those flavors combine in the oil (liquid).

The final thing to do is to drizzle on the lime (or lemon) juice to give it that citrus punch and to brighten things overall. TIP! Add some diced zabouca (avocado) in the mix and you can thank me later.

The question is always “what do you serve this with?”.. for me 4 things comes to mind immediately. Directly onto salted crackers as a snack. With plain old flour dumplings. A side to Dhal and Rice. Or served with boiled ground provisions or green cooking banana.

Yea, you can serve this warm or cold.

Drop me your comments below, tag me on Instagram and don’t forget you can now get my cookbook – The Vibrant Caribbean Pot, 100 Traditional And Fusion Recipes @ CaribbeanPot.com/CookBook/

Gluten Free Seafood

Roucou aka Achiote or Annatto Extract.

I recall our grandma referring to this extract as ooucou and it always found it’s way in her stewed fish and Pelau dishes, to give it at that rich colour and flavor (according to her). Today at home it’s used in just about every Caribbean stew and soup I make and during the warm months (grilling season), it makes an appearance in some of my marinades as well.

You’ll Need…

2 cups Annatto seeds
4 cups water
4 tablespoon salt

  • I’m sure you can use the powdered annatto seeds, but do keep an eye on the label as some may have dye added. I found that the paste does contain added ingredients to help preserve it’s shelf life so I shy away from the paste.

This is a very simple and straightforward recipe. Refer to the video below for further explanation of anything I may miss in this recipe post.

While our dad did teach me his way of making this extract (as explained in the video below), this is my technique and it’s just a few simple steps with basically the same results.

Place the annatto seeds in a large bowl and we’ll follow the following ratio 1:2:1. Basically one part seeds, 2 parts water and one part salt.

In a large blow I placed the 2 cups of annatto seeds, followed by 4 cups warm water and 4 tablespoon salt. Basically for every cup of annatto seeds I added 2 cups of water and for every cup of water I added 1 tablespoon of salt.

Please note that the salt is what will cure the extract, but also be mindful when using this in your stews etc that it will add a salt component to that particular recipe. Also note that you should wear gloves if you’re concerned about having your hands stained with the red extract.

Annatto is an orange-red food coloring or condiment made from the seeds of the achiote tree (Bixa orellana), which grows in tropical regions in South and Central America ( 1 ). It has several other names, including achiote, achiotillo, bija, urucum, and atsuete.

Allow the seeds to soak in the warm water for about 10 minutes, then using your hands/fingers (rubbing motion), start removing the red off the seeds. The warm water along with the salt will assist in this (the salt will act as an abrasive). It will only take about 3-5 minutes.

All you have to do now is strain, bottle and store in a cool dark place. May I recommend that your strain the extract 2-3 times to remove all seeds and grit.

I keep mine in the fridge and use a tablespoon or so in dishes. You will have to give it a shake before using as it may settle.

Like the Caribbean Green Seasoning I shared many moons ago, this is yet another ingredient which will enhance you Caribbean cooking repertoire.